Showing posts with label layout. Show all posts

Sunday, 27 November 2011

In Vogue with Pink Paislee's - Vintage Vogue

Hi all :) Gems here. 

This month I got to play with the gorgeous Pink Paislee - Vintage Vogue. The girly tones are perfect for scrapping photos of my daughter and I got to work straight away on the first of my layouts....

[A love of Words]

[Please Click to View Larger] 

Ashton is an avid reader and can often be found with her nose inside a book. One afternoon I popped into the kitchen and found her reading the Secret Garden and decided to snap some photos to record her love of reading. 

Purple is a colour I usually avoid in scrapbooking as I find it difficult to work with, but I challenged myself to create a layout using purple as one of the main colours, and I absolutely loved the challenge I set myself, and I am happy with the results. 


My second layout I created using the range was....

[In her Element]


[Please Click to View Larger]

Ashton was a flowergirl for my Brother-in-law's wedding back in July and I thought these pretty, feminine papers were perfect for photos taken on the day. 

I will be back tomorrow with a couple of cards I created using the same range and a gorgeous, extremely versatile product I adored using! 

Below are the products I used.......(Simply click on the picture to take you to the product in the shop) 


Wednesday, 9 November 2011

Halloween and beyond...


I'm not normally one for themed pages or ranges of products but after taking the kids to a Halloween party during the holidays, I had a whole load of pictures that needed scrapping.  The American Crafts 'Nightfall' was ideal for them.  I also noticed that the patterns on some of the sheets or the reverse sides weren't themed at all but perfect for using on layouts of my boys.

So picking out some products from the range, I set about challenging myself to see how many different layouts and looks I could make using just four papers and some tape, stickers and thickers as my main supplies.

I picked out:


'The Garratt's Halloween Party'
My first layout was about the Halloween party that we went to. The spider's web was inspired by a pattern on one of the papers, but because it wouldn't cut out easily, I decided to draw it using a versamark pen and embossed with some black Zing! powder.  I used a mixture of the papers and also the strips from the bottom of the sheets on this page as well as cutting out some of the ghosts and a pumpkins to embellish the page.


'I like Harry Potter!'
My next page again used some photos from Halloween.  Oliver was dressed up as Harry Potter.  During the summer, the Harry Potter films were shown on TV and he loved watching them and continually said 'I like Harry Potter!'  I swear that he actually thought that he was Harry Potter!  I used several strips of the chevron mixtapes, stuck across the page as a bed for the title area.


'Like father, like sons'
This was the third layout that I created using the Halloween collection but this time in a non-Halloween way.  This layout was all about how my two boys love computers.  Well, actually, they love damaging computers, but maybe one day, they'll be mending them too, just like their Daddy!  I used more of the papers, chalkboard sticker and tape, along with some Jenni Bowlin Mini Chalkboard Stickers and Jenni Bowlin Tiny Circle Alpha Stickers.  


'George's Nose Face'
My fourth and final layout (so far) tells the story of George's 'Nose Face'.  I'd typed and printed out some journaling in numbered points about how he makes this face and, trying to use up some more of the papers, I decided to cut out random strips to use as a mat for the photo and also to stick each point onto too.  I cut up one of the chalkboard stickers to use as embellishments on the page, before finishing it all off with a machine stitched frame and some zigzag stitching on some of the strips.


I've still got some scraps of these papers left, so I may still create more pages from them.  I've certainly had good value out of them so far!  Remember, if you want to see the layouts in more detail, then click on the photos to zoom in.

Friday, 9 September 2011

Hang it out...

Using twine and embossing powders 
part one...

When I started to think about my first blog post here, I decided that I'd like to use my two favourite products/techniques right now: Baker's Twine and using Embossing Powders/Stamps.

This stamp set immediately caught my eye: 
and I started to think about how I could use the peg image.  So thinking about combining the Peg with some Twine, I came up with the idea of hanging pictures on a line.  And so, this layout was born:


 Click the image to see a larger version

How I used the twine:

1. I began by wrapping a length of twine around the top part of the page.  The lemon twine was wrapped around twice and to make it stand out a little more, I added a length of the pink/yellow twine.


2.   This tag was stuck down with tape to secure it in place and then I used a small piece of twine, tied into a bow around the 'washing line' to make it look as though the tag had been tied on.

 
3. Again, I tied this tag onto the line but this time by just using a knot and cutting the ends down so that it slightly overlapped the photo next to it to add some flow between these embellishments..

Similarly, a piece of the pink/yellow twine was tied onto the 'Right now' title kraft tag.


Some ideas for using the stamp set and embossing powders:

Embossing powders leave a lovely glossy, enamel-like finish to the stamped image.  If you haven't already tried  them, I'd really recommend having a play as they add a new texture to your work.  I especially like using the cream and white powders as it's really difficult to stamp in ink with these colours.


1. I had a washing line on my page so I next needed some pegs to go with it.  Using a versamark pad, I stamped the image a few times onto some white cardstock.  These were then covered with black Zing powder.  I shook off the excess and used my heat gun to set the powders.  Some pegs seemed to emboss better than others so I was glad to have a few to choose from.

 I carefully hand cut around each image, also cutting right into the middle of the peg so that they would open up to attach onto the line:

To add a bit of colour interest and to complement the colours of the papers, I also used aqua Zing to make a turquoise peg:


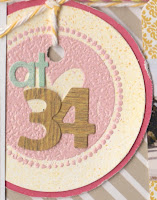
2. I decided to use the heart circle stamp to make a tag to add to the line.  I firstly sprayed some lemon and cream mists onto white cardstock.  When this had dried I stamped with versamark and added some grapefruit Zing.  Some of the spots around the circle hadn't stamped clearly so I used a versamark pen to draw them back in before adding more powder.

I punched out the image using a large circle punch and then stuck it onto some of the bright pink paper on the reverse of one of the sheets and then trimmed to leave a small border.

3.  I like the idea of using tone on tone colours and so experimented with adding the circle stamp to the background paper (which was made up a pattern of similar circles).  I stamped three of the images onto the edge of the page to create a visual triangle around the layout  (bottom left, bottom right and top right) before embossing with Butter Zing powder.  A tiny punched heart was added to the middle of one of them to further embellish it and also to create another triangle of punched hearts on the page, on this image, the jade tag and the yellow tag with the photo at the right hand side of the page.


It's my birthday in a few weeks time and I thought it would be nice to not only make a page about myself, but also to document some 'facts and favourites right now'.  So, I typed out some headings before handwriting my journaling and attaching in different ways to the page.

The tiny AC tags were perfect for embellishing and also for hanging on the 'washing line'.  I also loved that I got to use the co-ordinating patterns from the paper range without having to buy whole sheets of the papers.

I have another layout to follow tomorrow, with more examples of how to incorporate twine and embossing into your layouts .  Thanks for reading :)


My Supply List  (for both today's and tomorrow's layouts)
Twine:

Embossing Powders:

Stamps:

Papers:

Alphas/Embellishments: