Monday 28 June 2010

Joyride

Can you believe that it is nearly the end of June, where does the time go! The school holidays will soon be upon and and Sarah has been busy creating some pages featuring her three children.


Sarah has used the reverse of Cosmo Joyride Zoom Zoom as the base for her layout, trimming it down to 8 1/2" x 11". Creating photo strips is a great way to include lots of details of an event on one layout. Sarah has used some Jillibeans Journalling spots behind the photos down the right hand side to create a border. The alpha stickers are from Pink Paislee (Ambrose Coconut) used to create the title and a sticker from Cosmo Joyride cardstock stickers to add a little colour to the proceedings. In the top right hand corner, to add balance, Sarah has used her Fiskars Upper Crest Border punch on some Red Dotted Swiss cardstock and the star stickers used are from the black Jenni Bowlin memo note book (Sarah has removed the black stars from the sheet & added some blue paper beneath). A date stamp to record the day finishes this off nicely


Sarah has used Kraft cardstock as the base for her layout and cleverly, the sticker waste around the Pink Paislee Ambrose Coconut alpha (carefully removed from the backing sheet). The title "the kids" is Jillibean Soup Corrugated Alpha in Kraft and the flourish a blue Prima Felt flourish. The borders down either side of the sticker sheet are Bazzill "half the edge" edges. The black stars around the title are the ones removed from the Jenni Bowlin sticker on the previous layout (in the memo book) and the cream graph style paper behind Sarah's Journaling is from the Jenni Bowlin Memo Book The sticker used to journal the date is again from the Memo Book and the circle to the left of the felt flourish is from the American Crafts Dear Lizzy Fabric paper - Firefly Festival with a button on top

Don't forget you still have another two weeks to enter our sketch challenge, there have been some stunning enteries already. You could be in with the chance of winning a £10 e-voucher and the opportunity of joining the design team in creating an example layout for the August challenge. Just post a link to your page in the comments box on the challenge post or email your page across to sarah@sarahscardsltd.com.

Wednesday 23 June 2010

Back to the Grid.

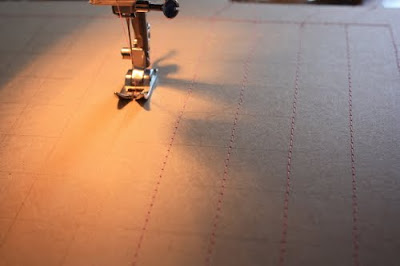
I love using patterned paper as my background paper when I scrap especially grid papers so I thought I would have a go at creating my own grid paper using stitching.
First I drew a grid on piece of kraft with 1" squares, I used pencil and just made sure that my lines were visible but only lightly drawn.


Then using the sewing machine I stitched all around the outside and along each line securing each end on the back with sticky tape.


When all the lines were stitched I carefully checked to see if any pencil lines were visible and gently rubbed them out. Next time I am going to try and extend my grid out further on the paper and make the boxes a bit smaller.

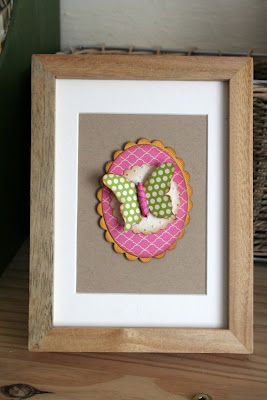
To create this page I have used some of the new Fancy Pants Wishful Thinking papers which are just gorgeous. The flower pattern on the Darling paper makes a great embellishment and would look even better if you had a couple of sheets to layer up elements of the design. I really love using punches when I am scrapping especially my butterfly ones but some punches which I have used much more than I ever thought I would are the circle punches. They make creating a scalloped border so easy, on this page I have cut out two different sized circles and then used the punches to add circles around the edges. If you want to add extra dimension you could curl the circles or even add two layers. The bunting has been cut out of the Strips paper but if the printed words didn't fit in with your page the bunting would make an excellent template to create your own.

Rachael

Monday 21 June 2010

Twitterpated

If you find a design you love why not use it on a few different projects at the same time? I started creating a layout with these gorgeous Pebbles Twitterpated papers, but while I was layering up the different shapes I thought I might as well make a couple extra, and these became a card and a decorative piece for my scraproom! The blocks are simple to make - I cut out several different shapes using chipboard pieces as a template (although printed designs or stamps would work equally as well) and layered them up onto circles and ovals, inking every edge in sight! I added accents like curled bodies, gems, embossed designs and glossy accents for additional detail.


Jen

Thursday 17 June 2010

Sketch Challenge

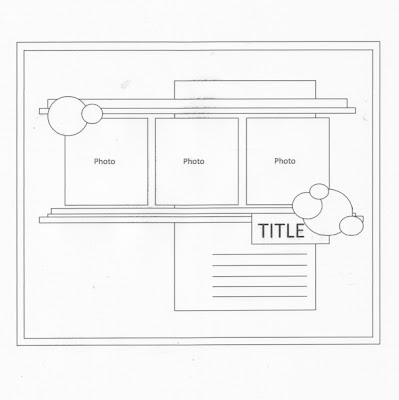
Are you up for another challenge? The challenge this month is to create a layout or a card using this great sketch that Jen has designed for us. All you have to do is post a link to your layout in the comments box or email it across to sarah@sarahscardsltd.com by the 12th July and you could be in with the chance of winning a £10 e-voucher and the opportunity to join the design team creating an example layout for the August challenge.


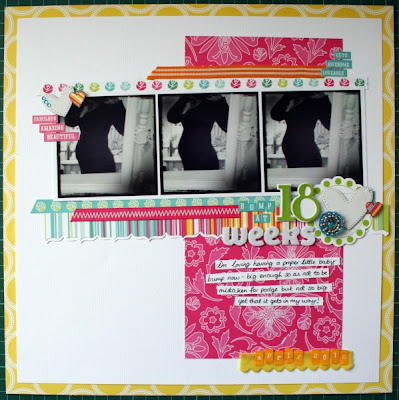
Daphne was our challenge winner in May and has produced another stunning layout using Jens sketch.


Jen


Lianne


Rachael


Sarah


Nat


Vanessa


Lou


Cathy


Rachel


Lou Collins


We hope you enjoy using this sketch as much as we all did and we can't wait to see what you do with it.

Wednesday 16 June 2010

Challenge Winner

Instead of a sketch challenge last month we decided to set something that was a bit messier, using paint on your page! Again we had some great enteries but the design team could only pick one winner and that was Karen with her stunning page "I love to read". She has been very inventive with her use of paint, the edges of the photos have been painted with blue acrylic, then splattered 0ver her background paper and she has used the lid of a mister bottle as a stamp to create circles on her page. To create the journaling spot Karen has painted onto a circle of acetate and then stitched around the egde. Well done Karen an inspiring page, if you drop us a line we will get your prize over to you.

The next challenge will be going live later in the week, Jen has created a fabulous sketch for us to use so watch this space!

Monday 14 June 2010

Lifes Sweet

To create this layout I used a brown sheet of cardstock and pink and white accents, almost like a box of chocolates! But when I was creating my page, I decided it needed a contrasting colour, hence the addition of the light blue. These Lily Bee papers were so nice to work with, and the patterns covered every theme, including bold for boys, and pretty for girls! I also used some of the Dear Lizzy Rose Trim, but I sprayed it with brown glimmer mists to co-ordinate with my page. It took the mist really well, and dryed very quickly!


Other Stash used .... MS butterfly punches, EK Success border punch, Aunty Sarah's Dew Drops.
Lou Collins

Friday 11 June 2010

Perfect

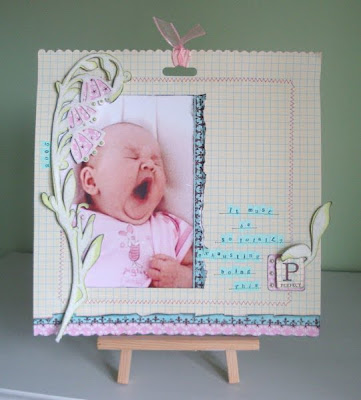
I loved the backing sheet from the pack of Lilybee Design Lovely Rub-ons, so I decided to use it as my layout base. I kept the design simple because I wanted to draw attention to the gorgeous voila felt lily orchid that I had decorated. On it's own it would have not stood out against the pale cream background, so I drew around it onto green cardstock, making some of the leaves much bigger than they actually were, and the stems slightly thicker, and then cut it all out. I put pink patterned paper behind the flower petals. Once I had lightly inked the edges of the green cut-out, I stuck the felt flower down on top of it, and added pearls to the flowers for a little extra detail. A ribbon at the top of the page made a feature of the hanging tab, and decorative strips at the bottom covered the barcode and some wording. To finish it off all that was needed was a bit of journaling and some machine stitching. I added a section of the felt flower, decorated in the same way, beside the journaling and title to balance the page.


Lou Collins

Monday 7 June 2010

Lily Bee Class

Fancy creating something stunning to grace the wall of your craft room? Lou Collins has put together this gorgeous class for you using the new Lily Bee Lovely range.

You will need…
Letter Stickers
Adhesive pearls (Kaisercraft)
Thick cardboard
Strong Glue
2 large B/W photos


1. Detach your four die-cut frames from the sheet, and arrange in font of you.
2. Print off two photos, at least the height of your frames, but not as wide. Black and white worked best here with so many other colours.
3. Lay your top left frame over one photo, draw around it, keeping the photo to the right of the frame, and trim the photo slightly smaller than your markings.


4. Repeat this step for the bottom right frame, and second photo. Ink the edges and put the shaped photos aside.
5. Now trace around each frame onto a piece of strong cardboard, and cut out.
6. Ink the edges of the four frames, and stick them to your cardboard. This will strengthen and support you finished piece.
7. Arrange the four strengthened frames in front of you, but upside-down. Slightly overlap a few of the edges, and using strips of cardboard, glue them into position. Do NOT turn over until the glue is completely dried! Neatness is obviously not important here!


8. Once dried, you should have a fairly sturdy base to work with. You can now start decorating! Begin by laying your shaped photos onto the base, and trimming strips of co-ordinated patterned paper to fit the straight edge of your photos. Sticking the photos down with foam pads adds even more depth.9. Add letter or word stickers to look like tags coming from under the photos.


10. Choose a large rub-on for a title and transfer onto white cardstock. Cut around it and trim another larger shape with decorative scissors out of patterned paper as a base. Stick down in the centre of the bottom left section.


11. Add chipboard flowers, and punched leaves towards the centre of the base, in the two sections that do not have photos on them.
12. On the last remaining section, the top right, simply add a date, or some journaling.
13. Add pearls or gems around the page, especially the flower centres and around the title.
14. Remember to ink the edges of everything…it adds definition and dimension! I have also outlined the frames with a black pen to enhance this effect.This can be made up in a number of different ways. Try placing all four frames in a line, either horizontally or vertically, or using four photos, and a smaller title. Either way, you can make a piece of art to hang or stand, as I have on an easel for all to admire!

Sunday 6 June 2010

A World Away

Rachel has been busy creating a page to show us using Cosmo Crickets Material Girl range.
"I really wanted to create a page that captured what my life was like for the 3 years that I was at uni. I always worked whilst I was at uni but never knew exactly how hard it would be to work full time, I now really appreciate the time I got to spend with my friends making things over the 3 years. I relish my evenings and weekends now when I can create to my hearts content.
I used this stunning overlay over a plain sheet of Bazzill and layered it up, I decided to do my journalling on the computer as I needed to keep the writing small as I had quite a lot to say."


We have got a stunning class and some gorgeous layouts to share with you over the next few days from the newest member of the design team, Lou Collins. I thought I would share a little sneak peek just to wet your appetite she really is one talented lady!