Tuesday 30 June 2009

Punches

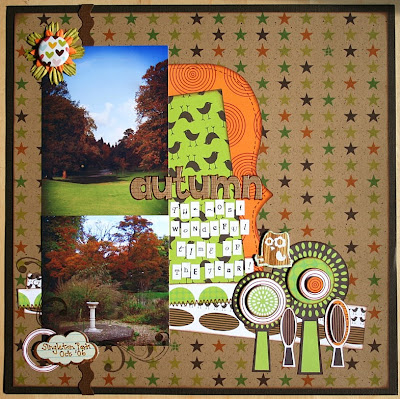
Punches are becoming more and more popular with a great selection on the market. They can also be used to create some fab stencils to use on your cards and pages. I like to have a border of some description around most of my layouts to hold your focus on the page. I usually draw around the edge or add my journaling but using punched stencils works really well.

Using your cropadile or hole punch create your desired pattern along the edge of a 12x12 scrap piece of paper.
Place your holey stencil over the paper you want to stencil onto and using an inkpad carefully go over your punched area. Rotate it so that all edges are stenciled.

Try using a variety of punches to create a background for your page. This Martha Stewart punch makes an excellent stencil.

Saturday 27 June 2009

My Little Shoebox

Cal has made some gorgeous cards using My Neighbourhood papers from My Little Shoebox. I love the way that Cal has used these papers.


Wednesday 24 June 2009

Crate Paper Lillian

Crate Paper have brought out some gorgeous paper ranges in the last few months, one of my favourite is Lillian, the range has got some lovely die cut papers and some fab glitter embellishments. Here is a class that I have put together for you.

You will need -

sheet of white cardstock
three sheets of Lillian paper mellow, blissful and tickled pink.
Die cut glitter embellishments
Black ink pad and pen
Button
Punches - Martha Stewart butterfly punch and two dot scallop.
large retro flower punch
American Crafts Thickers
Embroidery thread
Alphabet stamps
Bling

Stick the tickled pink paper onto the centre of your white cardstock and doodle around the edge using your black pen.
Matt a 7x5 photo onto a piece of blissful paper, distress and ink the edges. Cut out a piece of mellow paper and create a decorative edge I have used the dot punch. Stick both of these at an angle on the right hand side of your page.

Stick on a glitter die cut flower and then add a punched butterfly and flower onto the sides. Add a glitter bird, add a small circle for its eye and cut out a wing shape from the Mellow paper.
Add your title using different fonts for each word.


Add the date and some extra journaling, secure a button into the centre of your flower using embroidery thread. Add a few more punched butterflies and stick some bling down the middles of them. Stick on a smaller die cut glitter flower into the centre of the larger one.
TFL and I hope you enjoy putting this class together.
Rachael
xx

Friday 19 June 2009

Jillybean Soup

Nat has created this gorgeous layout using the fab Jillybean Soup range, here is how she did it-

I used “Chicken Stock” as my base, and added a piece of “Portobello” which I cut into a label shape on top. Next I added some “Half & Half”, and then strips of “minced shallots” running horizontally across the page. Next I added a Bazzill “Just the Edge” rikrak effect strip vertically to my page, and popped my photos on to the page. After this I added my title using the alphabeans orange graph stickers, and created my journaling using the mini alphas from my Little Shoebox. I created the tree embellishments by cutting and layering various shapes from the “morel” and “shittake” papers, using 3D foam to give them depth. A couple of chipboard stickers, blooms, an AC pin badge, some doodled stitching and swirly stamps completed my page.

Monday 15 June 2009

My Minds Eye ~ Bloom ~

I put this class together a while ago using some gorgeous My Minds Eye Bloom papers, the range of colours and patterns in the pack are excellent.
Stash used

Bazzill Cardstock
Button
Black inkpad and pen
Embroidery thread

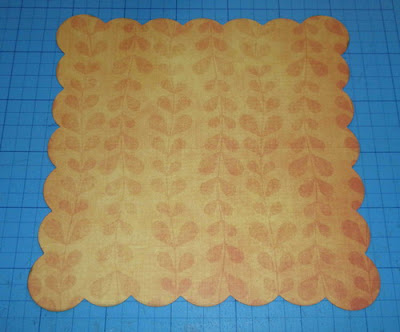
1. Cut a scallope piece of paper approximatley 11x11


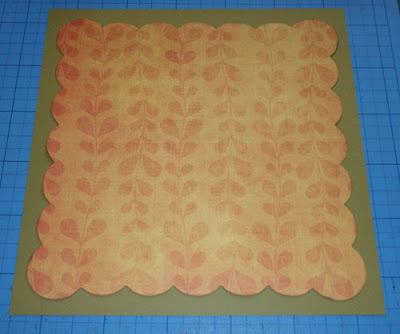
2. Cut out the centre of your cardstock that will be covered by the scalloped piece.

3. Stick your scalloped paper onto your cardstock. Hand draw dots around the edge.

4. Cut out a piece of patterned paper approximatley 10x5" and stick it the the right hand side of your page.

5. Matt two 6x4 photos onto the cardstock from the middle of your background card.

6. Using the die cut journaling block as a template create a scalloped tag and add this behind your matted photos.

7. Add a scalloped strip of paper down the right hand side of your photos. Cut the information strip from the bottom of the paper that you used for your scalloped shape, trim it so that it fits across the bottom of your photos. Paint the chipboard flouish using acrylic paint and stick it on the left hand side of your page. Add your journaling and embellishments.


TFL

Rachael

xxx

Thursday 11 June 2009

Crate Little Sprout

Cathy has created these gorgeous layouts and cards using the new very cute Little Sprout collection by Crate. Here she descibes how she did them:

& the Story Begins:

Starting off with a kraft cardstock base, I trimmed a little off the patterned paper & dark brown Bazzill to create a frame. Before sticking down I drew around & handcut about a quarter of an inch larger than one of the glitter die-cut mushrooms so that I could create a frame around this too. I trimmed several pieces of patterned paper to 3" x 3.5" to fit my photo's & scored about 1/2" down one side of each piece, these are then held in place on the mushroom with snaps (WRMK) The small orange spots on the mushroom are the centres from the scalloped Glitter border, some of the accents have been raised to create definition with 3D foam pads, the owls have been backed with plain paper to make them stand proud!

Olivia meets Noodles:
Self explanatory really - after making up my base with the Willow bordered paper I placed strips of the striped & plain yellow onto it & added a Glitter border under my photo.
I placed a selection of the Glitter accents together & used 3D pads to raise a few of them. To finish off I used some Pearls & a tiny strip of striped paper on my photo.


Here are a couple of cards Cathy created with the same range:

Friday 5 June 2009

Family Ties

As promised here is the second class that I have put together for my time as "blog highjacker"!!

Stash needed.

Pretty Please paper pack
Alpha stamps
Medium retro flower punch
Button
Embroidery thread
Fancy pants pin
Ribbon
Sheet of cream paper or cardstock
Black pen and ink pad
Foam pads

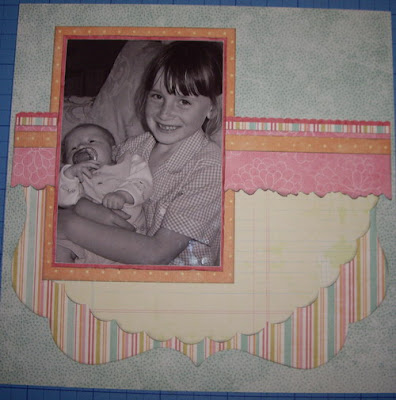
Cut out a scalloped piece of patterned paper, I have used another piece of paper as a template. Stick this towards the bottom of your background paper. Add a strip of paper approx 11.5" long creating a torn edge on one length.


Cut out a photo matt approx 5.5x8" and slip it in behind you stip of paper. Use one of the die cut stips and fix it in behind your long strip. Using either a sheet of plain cardstock or some cream paper create your journaling area scalloping the edges and stick this underneath the bottom of the photo matt. Add two narrow peices of paper onto your original strip.

(please ignore the buttons I changed my mind after I had done the photos!!) Create a second photo matt slighty larger than your 7x5" photo and distress the edges.
Fix on your photo, I have distressed the edges using an emery board.

Add a piece of one of the die cut strips along the bottom of your photo. Using the die cut daisy trim off the surround, curl each petal, add a punched flower and button to the centre.

Stamp your title and add it using foam pads. Using the thread fix on the button and stitch around your journaling area.
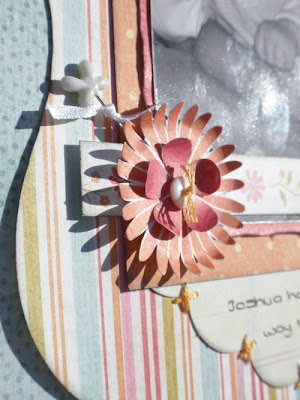
Push your pin down through the back of your flower and tie some thin ribbon onto it.

Hope you enjoy this class :)

Rachael xx

Tuesday 2 June 2009

Blooming Lovely

Use your die cut sheet to make your own embellshment, layer a die cut circle with one cut out of patterned paper using foam pads. Add some of the small die cut flowers to both the bottom and top layers sticking some bling at the centres.

Stash used.

Pretty please paper pack American Crafts puffy thickers Bling Autumn leaves stamps My little shoebox alphas

Watch this space for another class later in the week :)

Rachael

xx

Monday 1 June 2009

Pretty Please

There has been so many gorgeous paper ranges appearing in the shop since Sarah and Lianne went over to America for CHA 2009, one of my favourite manufactures has been My Minds Eye which is a new one for me. I just loved their ranges Bloom and Grow so I thought I would have a play with one of their newer products, Pretty Please.

I have put together a class for you using these papers plus a few extra bits from the shop.

Stash needed

Pretty Please paper pack
Bazzill Cardstock
Tickets MME breaking free range
Flower punches large and medium retro flower, double sunflower punch.
Border Punch I have used a different one but the effects are very similar
Buttons
Fancy Pants pin
Memories Stamp
Ribbon
Black pen and ink pad
Double sided sticky tape
7x5 photo


Cut out a large flower shape approximately 10.5 inches in diameter and stick it onto your chosen cardstock background. Ink all the edges of the papers that you use.

Using a black pen doodle small dots all around the edge of your flower shape.

Cut out a large circle and stick it into the centre of your flower.

Cut a long strip of paper approx 11" long and 2" wide. Cut one end into three strips about 1" long, stick some double sided tape down the centre of each sperate strip and roll them up.

Cut out a second long strip and using your border punch create an edging strip. Stick that and your other strip at an angle across your page.

Take the scalloped die cut from the die cut sheet, cut it in half and stick it on the left hand side of your page.

I have trimmed my photo down to approx 5x6.5", create a photo matt that is slighty bigger than your photo and distress the edges by running a sharp pair of scissors along the back edge and then rub it with your finger to make it roll and tear. Distress the edge of your photo using an emery board.

Using the large Retro Flower punch cut out 1 flower, curl the petals over backwards. I use my paper piercer to help.

Trim the blue flower cut out from the die cut sheet, add your puched flower on top, stick a double sunflower and button onto the top of that.

Add your matted photo tucking two tickets under the left hand edge. Stick on your large flower pushing the pin in behind. Tie a thin piece of ribbon around the pin. Add some medium retro flowers onto your page, fixing them all with buttons and embroidery thread. Add your title and your journaling goes around the outer edge of the large circle.

I hope you enjoy the class and I would love to see what you create if you upload to the UKS gallery please do leave a link on the kit thread.

TFL

Rachael

xx