You Will Need .......
Papers - Crate Paper Brook
Die Cuts - Crate Paper Brook
Alphas - AC thickers nutmeg, Adornit tiny cardstock stickers
Paint Dabber - Pool
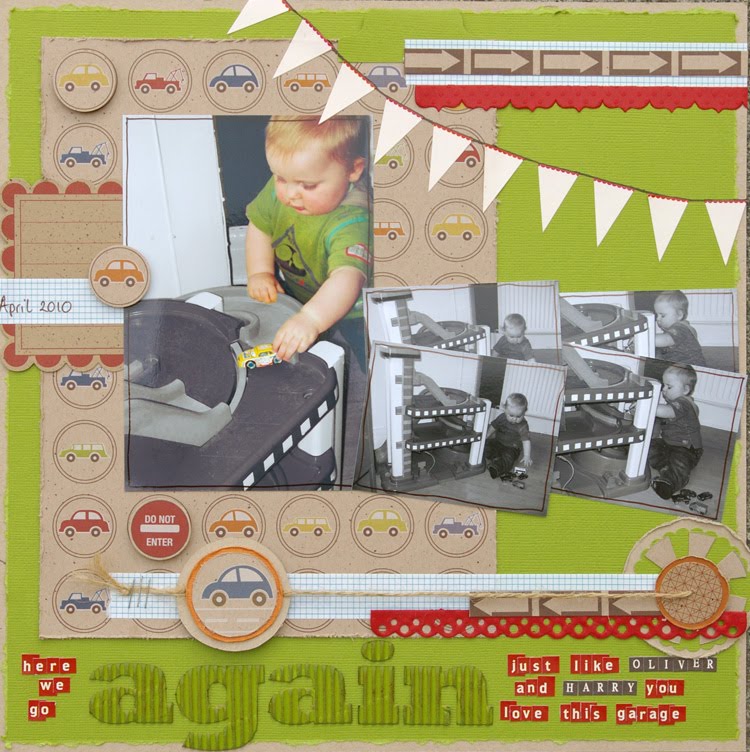
How To......
1. Cut a hole approx 9" in diametre in your background paper and then distress the edges of both the edges of the hole and the circle you have cut out. Add a few lines of stitching around the hole. Take the top of your paint dabber and using a paint brush add some different sized circles across the bottom of the hole and a few up the sides.
2. Matt your two photo adding a punched tab to them both and distress the edges of your matts, add a line of stitching to both photos.
3. Cut two strips of paper, one 7" and one 7.5", using a border punch create an edge on the longer strip.
4. Stick a piece of paper onto the back of your base paper filling in the hole.
5. Add the circle that you cut out earlier but stick it slightly off centre so that part of the base hole still shows.
6. Cut out another circle approx 8" in diametre and fix that on top after distressing the edges.
7. Cut out a small semicircle and add it to the left hand side of your page tucking it under the largest circle.
8. Add the two strips of paper across the bottom of the circles and stick your matted photos on top.
9. I have created my title using different rub ons that I had in my stash and some AC thickers.
10. Add some of the die cut shapes cutting out some leaf shapes to add to the flower, I have also added some old rub ons sticking them onto patterned paper and then cutting them out to create more substantial embellishments. I have layered up some of my embellishments using silicone glue to add extra dimension.
11. Using the tiny alphas add some journaling around the outside of the hole.
12. Scrunch the corners of the base paper and add some paint around the edge of your page.


I hope you enjoy having a go at this and as always we would love to see your interpretations, just leave a link to your page in the comments box if you don't mind sharing.
How are you getting on with this months challenge? We have had some great enteries and it seems to be getting alot of you to really experiment using paint. You have still got a couple of weeks to have a go, just leave a link to your page in the comments box of the challenge posting or email it across to us over at sarah@sarahscardsltd.com. You could be in with a chance to win a £10 e-voucher and the opportunity to join us in creating an example layout for the next challenge which will be featured on this blog.