Saturday, 18 February 2012

More Farmhouse....

Following my masculine page using the beautiful (lacey!) October Afternoon Farmhouse and Crate Paperheart range from my last post, I settled down to another page, quite different in style with lots and lots of colour and pattern on the one page:
It's one of those pages that records one of the tiny details of everyday life that one day, if not recorded would not be remembered. I noticed how one day our hats, tossed together on the hallway sidetable, were both very similar and very different at the same time, but uncannily summed up our personalities. We'll probably have new hats next year, so I thought this passing moment was worthy of documenting...... besides, who needs an excuse to use gorgeous stash?!


I wanted to create an interesting spot for my journalling to be written on to, and made the stitched heart that you can see above. I began by cutting a heart shape from a piece of scrap cardstock, removing the centre so that the remaining frame could be used as a mask:
I layed this on to my layout where I wanted the journalling to be. Using a white mist (see the links at the end of the post for my supply list), I isted through the it onto my page. Once this was dry, I used a sewing machine to stitch lines across the heart, following the lines in the gingham pattern to ensure they were straight (or at least that was the original plan - but my machine decided not to play ball, so I ended up punching guide holes with a pokey tool and stitching the lines by hand in backstitch.....a job that should have taken five minutes ended up much longer!!):
And the finished result looked like this:
My stitched lines overshoot the edges of the misted heart a bit to give a slight kookiness to it.

Thanks for stopping by, don't forget to check out our movie-inspired challenge while you are here!

My supplies included:

Wednesday, 15 February 2012

Lacey Patterns - Not Just For Girls!

My shopping preferences when it comes to scrapbooking tend to be on the girlie side- I'm swoon all too easily over floral, gingham and polka dot patterns and pretty colours...so it's just as well that my scrapping is usually concerned with my sister and I, or my girlfriends, or my niece and stepdaughter. So naturally when I spied the pretty colours of Crate's Paperheart and lacey patterns of October Afternoon's Farmhouse lines, I snapped them up knowing I'd make good use of them.

However, on flicking through my digital folder of "must scrap" pictures, I realised I must get around to scrapping Mr T's birthday photo....keen to use my new stash I was pleased to see that, if I focused on the cool blue and grey patterns from both lines, I could easily use them to create a masculine page that Mr T would not be embarrassed of! ;)
First of all, I made the basis of my page - I felt the bold chevrons stopped the pretty lace patterns from getting to girlie on my masculine page:
A little "blooper reel" here for you! I decided that plain chipboard letters suited the colourscheme ofmy page, but thought about customising them somehow, and remembered these fab grey Studio Calico rubons I'd had for ages. I got them out of the pack and quickly and gently laid them on top of my letters to see what they'd look like, but decided it may be too distracting after all as my letters were already sitting on a lot of patterns.
So when I took the rubons back off, I discovered that one of the sticky little blighters had partly attached itself to my photo! Grrrrrrr! Disaster! "Just print off another" I hear you say - but the computer and printer were both all switched off, and as it was a very dark mobile phone pic taken in a polaroid-effect app, so I'd spent a while lightening it up and balancing the colours out in Photoshop - but of course, as it was only a mobile phone pic as I wouldn't need to print it for anything again, I didn't save my changes! I couldn't be bothered to do it all again!
So instead I created a cluster of embellishments of buttons, stickers and punched circles to cover up as much of it as I could. Taking inspiration from Jen's post, I pushed some numbers from a mostly-used Thickers pack and pushed them on to pins; an alternative to the pearly and sparkly stick pins I love using on my pages.
I created the rest of my title using the really cute Sticky Keys alphas from the October Afternoon Farmhouse range. I wanted my title to be aligned to the right hand side, and when I find I need my title to line up in this way or fit in a given space, I always start with the last letter first, working backwards, as you can see on the word "Toms" below: 
Lastly, I wanted some brief bullet style journaling, which I knew I wanted in the bottom right corner where the grey gingham pattern was, but I felt that my journaling wouldn't be legible on this pattern, and didn't really want to add any further elements like journaling spots or more patterned paper in this area to compromise the balance of my design. So I decided to slip a large circle punch under the paper and use the resulting negative space as a spot to journal within, straight onto the pale chevron background paper. And the punched circle didn't go to waste - if you look back carefully at the cluster of embellishments cover the rubon disaster, it's nestled in there nicely :)
So the moral of the story is don't shy away from purchasing papers that at first glance seem feminine if you have more "manly" project in mind or have boys to scrap - and if you want to see how rubons may look on your page before committing, cut them away on the backing paper from the rest of the sheet first!!!

And just in case you are not already a fan of the Sarah's Cards page on Facebook, now is a great time to check it out as Sarah & Lianne are holding a fabulous giveaway.....
Go check it out! Go! Now!!

I will be back over the next few days with a couple more pages showcasing some of the Crate Paperheart and October Afternoon Farmhouse range - check out the links right at the end of the post for the supplies I used.


My supplies included:

Saturday, 11 February 2012

February Challenge!

Hi everyone! It's Natalie here with your February challenge....

It's the Oscar's month this month, so we would love to see your movie-inspired layouts. An easy challenge that we will leave you to interpret freely!

Here's the design team's spin on the theme:
Ifa was inspired by the awards ceremony.........
 Helen has a little "Jedi Knight in Training" at home.....
 Laura's lovely wedding themed layout uses a title inspired by the film The Notebook....
 and finally my take on the challenge; my little niece is "My Favourite Deputy" - the title inspired by Woody from the Toy Story films.....

As it's leap year, you have an extra day to participate in the February challenge this year! You have until the 29th to add your link to the Inlinkz tool below to be in with a chance of winning a £20 e-voucher for the shop - just in time for all those tempting CHA deliveries!!

Be sure to add your links to the Inlinkz tool rather than in the comments section to make sure that we will count your entry in the challenge!

We look forward to seeing what you come up with!
Nat xx

Thursday, 9 February 2012

Pocket scrapbooking...


Like many other scrappers this year, I've decided to create an on-going album for 2012 to document our lives.  There are resources out there that you can buy to make it a fairly straightforward process by adding photos and ready-made journaling cards to page protectors.  I like the idea of this but am, instead, using the many papers and embellishments that I already own to do this along with some new stash that I just fancy the look of!

I've settled on using American Crafts 12x12 page protectors which are divided into 6 6x4" portrait pockets.  Using this size means that I can just print off a 6x4 photo and add it to a pocket.  What I've also disovered is that 6x6 paper pads are perfect for this project.  Each week, I've chosen some sheets of 6x6 papers, trimmed off a 2" strip and used these as bases for each of my mini-layouts to document our week.

I treat each pocket as a little layout whilst also thinking about the spread as a whole.

These are my  weekly spreads for Weeks 3, 4 and 5 of 2012:


Weeks three and four use a mix of co-ordinating papers but for week five, I went for an more matching look and kept the background papers the same for the whole of the top and bottom strips:


*The individual cards in more detail:

On this first card, I used a notebook punch to add some interest to the base.  The number stickers refer to the journaling on the next card.

The date sticker on this card is from a selection from Jillibean Soup.  The frames are American Crafts stamps which I embossed and then cut down to use as embellishements.

This card was all about George and his word of the week.  I designed and cut out the speech bubble using my re-discovered Craft Robo.  The journaling card is a freebie which I printed and then added the Amy Tangerine paper clip.

The bottom half of this week's page was all about Oliver's trip to Build a Bear Workshop.  To keep some uniformity between these three sections, I used the same base papers.  I also added some washi tape across two of them to make them appear connected.  The other half of one of the stamped frames from a previous card was added here to fill a gap.

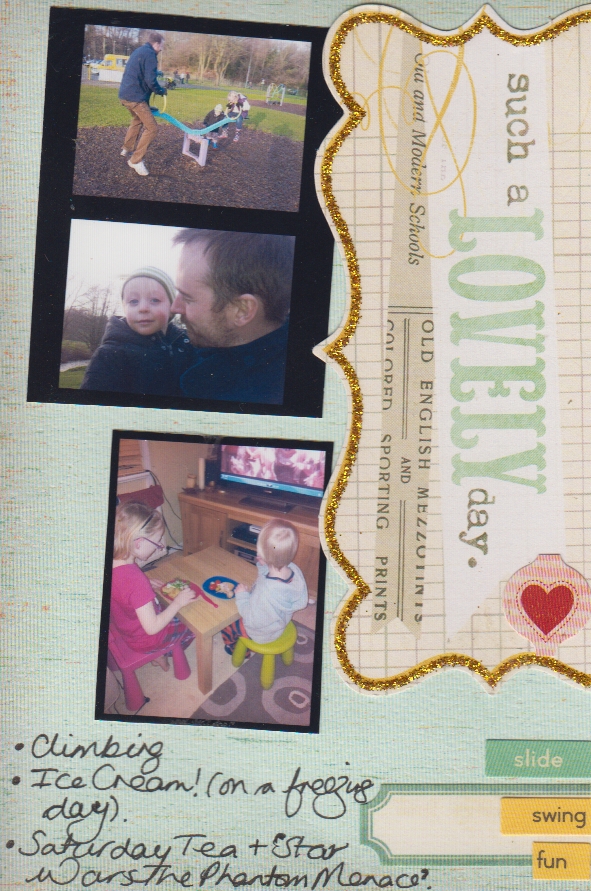
I used lots of different stickers on this mini-page.  I often cut label stickers down to add as embellishments; it makes them go further this way!.  The curvy, glittery cards were actually borders cut from a MME title card.  The journaling card is by October Afternoon and I added another shaped paperclip for some more interest to the layout.

Oliver was very poorly last week and this is him looking really sorry for himself.  The days of the week are an American Crafts stamp which I randomly placed around the page before circling 'Saturday' and 'Sunday' to show when he was ill during that particular week.

I made the play tag using my Craft Robo and edged it with part of a Jiilibean Soup sticker.  The tag was finished off with some twine which I also wrapped around the whole card too.  I used number stickers again to link with the journaling card.


To add some colour to the pale background paper, I cut a strip of the blue paper and used a border punch to add interest to the edges.  The bullet points were cut using my Crop-o-dile from a matching paper.


In order to fit in a lot of photos from a day out, I created some photo strips.  I added a couple of tickets, secured with staples and made a border along the bottom with a number of stickers from a sheet by Fancy Pants.

The 6x4 pockets are the perfect size to use MME title cards on.  Here I cut off the top glittery border so that it lay flush with the edge of the card.  This also meant that I had some left over which I used on the first card for this week.

To break up the dark background I added a Crate Paper border sticker and some cut up banner stickers from the Fancy Pants sheet.

I used more stickers as embellishemtns here along with a date stamp to record the dates of that week.
To mirror the first card on this top strip, I add another co-ordinating Crate Paper border sticker along the edge. 


This final pocket was one of my favourites to make.  I designed the 'snow' word and border and cut with my Craft Robo. I found an old piece of Hambly overlay that resembled snowballs/flakes and stuck this on top of a piece of pale blue card after adding some snowflake shapes, tiny punched circles and blue glitter between the layers.  When it's all sealed, you can shake the card to make the snowflakes fall.


I have really been enjoying keeping this scrapbook diary of our family life so far this year.  Scrapping these small pockets one at a time has kept me on track as I don't feel overwhelmed by completing a whole page in one go, instead I can spend a few minutes here and there over the course of the week, creating a mini-page at a time and then feel a huge amount of satisfaction as I finish the final one and file it away.