Friday, 10 June 2011

Up for a challenge?

It's that time again! Time for the monthly challenge where you have the chance to win a £10 e-voucher to spend in the shop along with the opportunity to design an example page for the August challenge.
In keeping with the new changes to the blog, each month the challenge will be set by a different member of the DT.... and once again, I get to go first, so here goes.

When I buy clothes for the boys, it's often the funky little details that draw my attention and make me buy the garment. So I got to thinking, why not use these details as inspiration for my scrapbook pages. So off I went to rummage through the wardrobes. I selected 3 t-shirts, the first for the turn back button detail on the sleeve, the second for the graffiti style union jack design and the third for the stitched number detail on the back.

I recently bought the Teresa Collins Stampmaker Machine, and decided to make the union jack into a stamp. I have to say that this new gadget is a must for anyone who loves to use stamps on their LOs. I ummed and ahhed over it for months, and now I have it, I love it, and can honestly say I think it will become one of my most used tools.

Nat produced a stunning LO for this challenge.

This is what she says about her LO...

'Two items in my wardrobe that inspired my page. The scarf provided the cue for the soft blue colour palette, and the contrasting crocheted edging inspired me to use felt embellishments to add texture to my page and to have a go at crocheting on paper, something I'd seen on Pinterest! The blouse is very feminine and has elegant little touches, such as the big bow and ruffled edges, which inspired my choice of embellishment which have a similar elegant feel. The muslin panel inspired me to play with the idea of white on white and translucency - so I spent time layering up pieces of velum to build subtle depth (I loved how layering them up altered how visible the patterned paper was underneath), and used white barely- there ghost letters to create my title. Even the label inside provided some inspiration - the doodle effect heart inspired me to stamp some hearts onto note effect paper'.

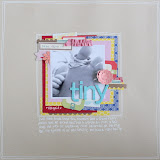
Rachael used her daughter's new lace edged, layered top as inspiration for her gorgeous LO, I love the subtle colour difference in the crochet lace trims... and notice the painty splatters? I approve...lol!

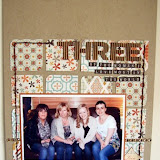
Gemma produced an amazing LO as a tribute to her lovely Grandad who recently passed away. Having such a gorgeous little girl, it was a given that she would find some beautiful details as inspiration. I love the patchwork effect Gemma has recreated, and the fab corrugated card embellishment is just too cute.


Well I hope we have inspired you to play along with us. All you have to do for a chance to win is create a layout or card using clothing as inspiration, then leave us a link to your creation (please include a photo of the clothing too... if it inspired you, it might inspire someone else too) in the comments box by Thursday 30th June. I will be back on the 8th July to announce the winner.
Happy creating!
Louise
x

Wednesday, 8 June 2011

Challenge Winner

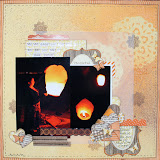
Although the blog has got a new look with lots of new features some things are staying the same, one of those being the monthly challenge! Lou will be posting this months challenge in a few days time but before she does we need to reveal the winner of last months. As always there were some stunning entries and we were really pleased that you enjoyed using the sketch. Our winner is Deirdre who designed this stunning page, we loved the grungy feel of the page. Congratulations Deirdre! Drop us a line and we will get your £10 e-voucher to you along with details of next months challenge.


Don't forget to check back in a couple of days to see what great challenge Lou has come up with for you this month, I think you are going to love it!

Monday, 6 June 2011

Engagement Mini Book

Hi all, I hope you enjoyed Rachael's class, great to see how she does it isn't it?

So now from one Rachael to another Rachel (notice the difference)

I dont know about you but sometimes you have a day out or event where you end up with tons of gorgeous photos but you have no chance of scrapping them all. This is what happened with the gorgeous photo shoot my future Sister in Law did for us when we got engaged in March.

So I thought I know what I will do, a mini book, I used to love mini books but havent made one for a very long time so thought it was about time i did.

I loved all the photos, so first thing i did was reduce them in size using Picasa and made them black and white so they would go with any paper.

I chose quite a random selection of papers from different manufactures but all with the some kind of colour, Red, Blue, Yellow and Black.
(Sorry not the greatest photo there)

I used bit from
Circa 1934, - Cosmo
5 & Dime- October Afternoon
This and That- Lily Bee

I used embellishments from

I didn't really have a size in mind for this but had thought no bigger than 8x8, and the others were just quite randomly cut. I wanted to show you how with just a few different pieces of papers and cute stickers you can make a book in a couple of hours.

So this is what I came up with


My first couple of pages probably took the longest simply because by the time i had done a couple I had loads of little off cuts and just used them, by restricting your supply it makes it much easier to scrap quickly, and i am all about scrapping quickly.

Take this page for example


Its that size as that was a off cut from a previous cut out, i had a few bits already cut from a different page and just kind of stuck them down.

then i added a bit more
and then a few stickers
Ta Da!
I applied this principle to the rest of my pages and found I got quicker and quicker.

The stickers i used a really nice and cheap way of adding a little extra to the page, I'm crazy about the Sassafras stickers.

I finished off the mini book by doing a 8x8 page and then just layering all the bits I had left over, I still have loads of paper left for a good few 12x12 pages.

I thought about how to tie it all together, i had planned to use a book ring but to be honest i couldnt find one anywhere, so I used a tie that had 2 cardboard people on.

So there you go by limiting your supplies and using your off cuts you can create a bit mini book in a very short time.

I hope you have enjoyed the post, let me know what you think, and if it has inspired you to make a mini book, then do share the link and I will have a little look at your blog/gallery.

Check back in a couple of days for some more exciting times on the Sarah's Cards all singing all dancing blog.

Thanks Rachel x

Friday, 3 June 2011

The Dress

I hope you are enjoying the new look blog, I think you will agree Lou's class was amazing and she has definitely inspired me to try and be a bit more adventurous with paints and inks!
I don't know about you but I have got boxes full of embellishments in my craft room all of which I absolutely had to have at the time but my favourite way to scrap is to just use the patterned paper with very few if any embellishments. There are so many great paper designs out there, one of my favourite has to be Websters Pages but I know a lot of people say they aren't sure how to use them because of the pictorial designs. So I have put together a simple class using some gorgeous Hollywood Vogue papers.

Stash Needed
6x4 photo
Bazzill White
Websters Pages, Hollywood Vogue
Length of lace
Black ribbon
Acetate
MME Stella & Rose stamps
Black Stazon Ink
Stickles
Pin Flair Gel or something similar
Liquid Pearls
Sewing machine or black embroidery thread

How To
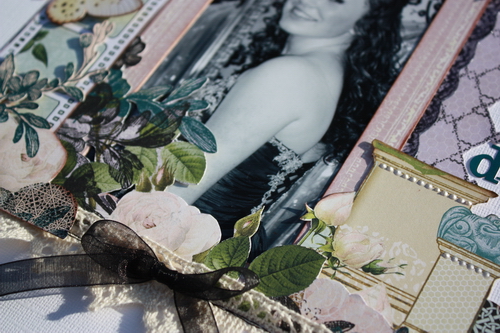
Machine stitch a length of lace across the bottom of your page and an L shape on the right hand side of the layout. If you don't have a sewing machine hand stitching will work just as well.


Cut the film strip out of the patterned papers cutting around the roses at the side and bottom, stick this onto our page but only add glue to the centre so you can push other elements underneath.


Matt the large frame from the sticker sheet onto some scrap paper, cut it out and frame your photo, add it to your page tucking the bottom into the lace and overlapping the roses onto the frame.


Cut out the floral corner from the "Shine A Light" paper and add it to the bottom of your photo, pushing the end under the photo strip and the bottom into the lace.


Cut out another floral corner from the "Double Feature" paper and add over the top.


On the "Foo On Film" paper there is a decorative corner, cut that out and add it to the top left hand corner of your page, use pin flair gel to raise it up slightly. You also need to cut out the little pillars from the same sheet of paper and add this to your page but only add adhesive along the bottom edge.


Stamp a lace pattern onto two strips of patterned paper, I have used a small Prima stamp but if you don't have anything like this you could easily draw this sort of pattern free hand. Cut along two of the edges to create a decorative edge and add the two strip to the edges of the framed photo. Don't worry about the overlap at the top as this will be covered.


Create another lace border using the MME Stella & Rose Remember stamps to go around the framed photo. Measure the length that you need the border to be and stamp the image onto acetate using Stazon Ink. Cut the image out when it is thoroughly dry and add it around the photo.


To cover up the corner cut out the Chandelier from the "Double Feature" paper, to add a bit more interest I have gone over the black elements with stickles. This will need a long time to dry so don't be tempted to use it too soon, I speak from experience!!
Once it is dry stick it to your page adding some pin flair gel to the bottom edge to raise it up.


I have cut out a butterfly from another Websters paper range and added that to the page but a stamped butterfly would work just as well. Alternatively you could use the butterfly from the sheet of stickers that comes in the collection pack, by matting it onto a scrap of cardstock you will be able to bend the wings up.


Add a ribbon bow to the bottom of the page and some liquid pearls to the top of the pillar and then all you have to do is add your title and journaling if you want to. I am awful for adding journaling onto the actual page no matter how hard I try I just hate my writing on my layouts. To get over this I have started journaling on the back, I know it isn't visible when you flick through your album but at least the story has been documented for the future.


Another paper range that has got some amazing designs to cut out is Pink Pailsee, I have created two layouts using their Daily Junque range. The only extras that I have used on these pages is some bakers twine, tissue paper, some alpha stickers, MME stamps and some liquid pearls.


I have been really inspired by Lou's use of stamps and paints so thought I would take the plunge and stamp directly onto the layout, something I always avoid! I am actually really pleased with how it looks and it was definitely worth a go, next time I am going to try and be a bit more adventurous and maybe crack the paints out!!


I have fallen in love with the bakers twine, it adds great depth to a layout and is so easy to use. I decided roughly how I wanted the twine to lay and then added it a bit at a time just gluing it where the twine overlapped on the twists using a hot glue gun.


This page was really simple to create, all the little tickets on the right hand side of the page are one image cut out of the "Tickets" paper.


To create the centre strip I simply cut a long strip of tissue paper, it doesn't have to be straight, and then pleated it. I cut it in half and stuck it to the page using a very small amount of repro herma and then secured it properly using a line of machine stitching. Then I just added the other all the other elements around the tissue strip.


The photo has been matted on a piece of chipboard to add extra depth to the page, I wanted to add a bit of bling so have used some liquid pearls around the edge of the photo.


I hope you have enjoyed this post, we would love to see what you create using designs cut out of patterned paper, if you would like to share just leave a link to your blog or gallery and we will pop over and leave you a comment. If you have any questions about any of our creations or posts please ask away.
Check back in a few days time when Rachel Ward will be showing you what she has been up to.