Tuesday, 29 October 2013

A little Halloween project.

Hi all. Jen G here with a really quick Halloween project to make for your kids that doesn't involve sugar! You may have seen this idea on Pinterest - that place is full of great ideas - I just Halloweenified it (yes it is a word - well now it is!) It is a corner bookmark and it is super easy to make. 

Cut a piece of cardstock as shown. Each of my squares is 2"x2".

Then cut two of the squares across the diagonal like this:

Fold over one of the triangles:

  Then fold over the other triangle and stick it onto the top of the first triangle. 

 Flip the whole thing over and decorate with a square of Halloween paper.
 Flip back again and decorate the top triangle with more Halloween papers. 

Done! 

These are really quick and easy to make and my kids love them. I made one for each child at our Halloween party last week and popped them into the coordinating party bags using the Pebbles Thirty-One range.

I have plenty of the Pebbles Thirty-One range left to scrap the photos from Halloween so I'll be back at some point with one more Halloweenified post :) 


Saturday, 26 October 2013

No tricks, just treats (part 2).

As promised, here's the second part of my Halloween treats ideas.


 This matchbox is the perfect size to package some chocolate skeletons, (the best kind, in my opinion.)


This one is a tag box, and can be made really quickly.


Finally just a couple of simply decorated clear card bags. I used black Stazon ink and stamped the bats border onto the larger bag.

I hope I have inspired you to get spooky this Halloween, or given you some gift bag/box ideas for other occasions, maybe Christmas?

Don't forget you have until the end of the month to join in with Octobers sketch challenge, details can be found here.


Friday, 25 October 2013

No tricks, just treats (part1).

Hi all, Tracy G here with a few non-scrapping creations. Like some of the other DT members, I have gone with a Halloween theme for my post this month. I have made with a few Halloween treat ideas for you, but of course if you don't celebrate  Halloween, you could also use some of them for other occasions using different supplies. I have chosen to work with the MME Happy Haunting range, the papers are almost cardstock weight and some have a gorgeous orange glitter on them too. I also used some stamped images from the clear stamp set.
I hope my instructions are clear enough to understand, as I was so enjoying  making the items I forgot to take photos of every step. If you do need anything clarifying, please leave a comment below and I will do my best to help.

Firstly I made a cute little witches hat, which could be used to hold little treats, or as home decor.


 Here's how I made it. (Just click on the photos to make them larger).


I then made this really simple bag/box.
  Just cut a piece of paper to 8 1/2" x 6 1/2", score every 2" on the long edge, and 2" on one end. Cut on each 2" score line up to the bottom score line to make the flaps for the base. Stick the sides and bottom flaps together, pinch the top together, punch a couple of holes in the top. Then thread and tie a piece of tulle or ribbon through the holes.


Next I made this peek-a-boo box.


This box I am calling a half cracker,  I'm sure you'll see why.


 If you're having a party, why not decorate some bottles of pop for the children?, or bottles of something a little stronger for the big children. (adults).


This sheet of paper is fabulous to use with some cheap frames, for some instant home decor.
It's not obvious on this picture, but all the orange bits are glittered.


Please come back tomorrow for part two of my Halloween creations.


Wednesday, 23 October 2013

Summer Fun but not quite at the Flea Market.

Hi! It is Ifa with you today. Surprised ? I am taking an early slot this month. Are you enjoying your half term ? Ours is next week.  Perhaps I will see some of you in London ?

I ordered a few products from Maggie Holmes Flea Market by Crate Paper. I have been an admirer of Maggie Holmes for ages, I just couldn't resist.  I especially love the fabric frames.  I had vision of using the whole pack on one layout but alas, I stretched to four layouts and I still have a few large frames left over. How decadent would that have been ? I also ordered the Ephemera Pack, though I was worried about all the gold embellishments.  Reminds me of peel off!


I also ordered these papers.  I love the colours, especially the mix of "blue" next to pink and yellow. Reminds me of sunny happy days, though perhaps not browsing a flea market!


I also sneaked in some Studio Calico plastic die cut stars into my order. Ever got the feeling, "I must order another pack, I never want to ever run out of this" ? Well, these stars is my go anywhere product, a scattering on a layout lifting my spirit.

I also used a pack of chipboard thickers alphabet in white that I coloured and glittered to suit my layouts, some colours in the forms of My Huey's and Gelatos and a mask for some spots.

My first layout is Love Crab, my dear J showing off his delicious looking crab. I think I had crab most days we were down in the New Forest.


I have used some embellishments from the ephemera pack. I want to draw your attention to the die cut Love and the chalkboard love, both of which are gold.  I think they look contemporary rather than old fashioned. Do you agree ?


I had to use Bingo and Found It for a layout about finding the elusive Wi-Fi in the New Forest. We were regulars at the café in the village. You might have spotted some more gold embellishments?


My third layout is about our trip to Thorpe Park. My dear H loves roller coaster so I went with him on The Swarm. I have used some tag shapes from one of the papers to decorate the top of my layout.


You might have noticed those plastic stars by now. Don't they make you smile ?


Another overall theme to my layouts are the spots to the top/bottom of each layouts and some orange twine. I have used a very limited range of products this month because I have had to give up my craft room for visitors.  But it was very empowering too, not permanently going back to look for other products to use.

I said four layouts, right ?  My layout for the sketch this month also used the same kit. See you next month.

Monday, 21 October 2013

A Twinkling Halloween

If you're itching to get your Christmas lights out (I know its waaayyyy too early!), I've found the perfect project to give you the excuse.  Halloween Lanterns!

Its a really straight forward, but effective project, all you need are a stack of clear plastic cups (from the party-ware section in supermarkets), your scrapbooking papers, your usual embellishments and your creativity.  


Firstly, cut with your craft knife, a cross in the bottom of each cup, this is where you will poke the lights through - they will hold.


This is the trickiest part of the project, gradually roll the cup along a piece of paper tracing the movement with a pencil at the top or bottom end of the cup, then carefully roll back again tracing with a pencil at the opposite end.  Once you have a long enough piece, join the sides and cut out.  This will be your template to use to cut out the pieces for each cup, from your chosen paper.  I've used Basic Grey's Persimmon range.


After covering each cup, you can then decorate and embellish as you wish, its as simple as that.  I have inked the edges of each piece of paper, used a ribbler on some.  Covered the edges with trims and borders.


And then hang!


Thanks for looking and keep checking back, the girls have some fab projects coming up.


Friday, 18 October 2013

It's sew easy!


Have you seen the new sewing kits that Sarah and Lianne have been busy designing?


Inside each of the cute, white boxes (I'm a sucker for attractive packaging!) is everything you need to complete the design (NB the hoops are bought separately though): a clear set of instructions and a easy to follow chart, threads organised onto a card, a piece of evenweave fabric and even a needle.  They'd make a great gift!


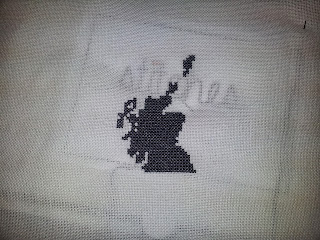
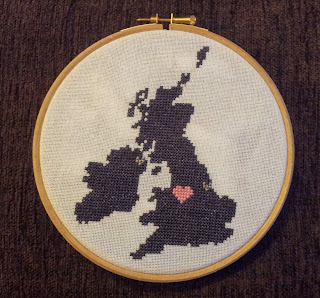
The designs themselves are really straightforward to stitch: there's no fiddly outlining or part stitches so perfect for beginners or more experienced cross stitchers who fancy a straightforward project.  What  I really liked was that they feel really achievable.  Over the years, I have started countless sewing projects only to get bored/start something else before completing them.  Instead, I spent about 8 hours last weekend working on the 'home is where the heart is' design, popping it into the hoop, trimming the excess fabric and having a finished project to hang up.


If you fancy personalising the designs, it's easy to adapt them and add your own touches.  For example, I shifted the pink heart slightly so that it appears where we live.  I also added a couple of smaller pale grey hearts to show where my husband and I are both from.

The finished project!

I've got the sunshine kit ready to begin and I get the feeling that this may be the start of me working my way through each of the designs...