Thursday, 8 March 2012

Waiting for baby.

Hello all, it's Louise with a couple of LOs to share.
My best friend is very full of baby, and we are all eagerly awaiting her little boy. I've started a scrapbook for him, and can't wait for those very first fresh from heaven baby photos.
Part of the excitement of preparing for the little ones arrival, has been pinning cute baby items on Pinterest. A while ago I saw some really cute paper feathers and pinned them, knowing that one day I would try to get them on a page. The 20 week scan photos were perfect for the feathers as the baby was just a tickle in his mummy's tummy.
I kept the LO really simple, dry brushing some acrylic paint onto the spotty background, before layering patterned paper strips and a couple of Amy Tangerine dies cuts. I made a little pocket at the top of the page and added a tag ready for the mum to be to add some journaling about the day.


These Thickers used to be pale pink and shimmery... I used baby blue paint, a feather stamp and glossy accents, to decorate them to match my LO.
The feathers are so easy to make. I can really see me using them again on a LO for me to keep... to be fair I can see me making Indian head dresses for the boys to wear, so I get the perfect photos to go with my feather embellishments... lol!

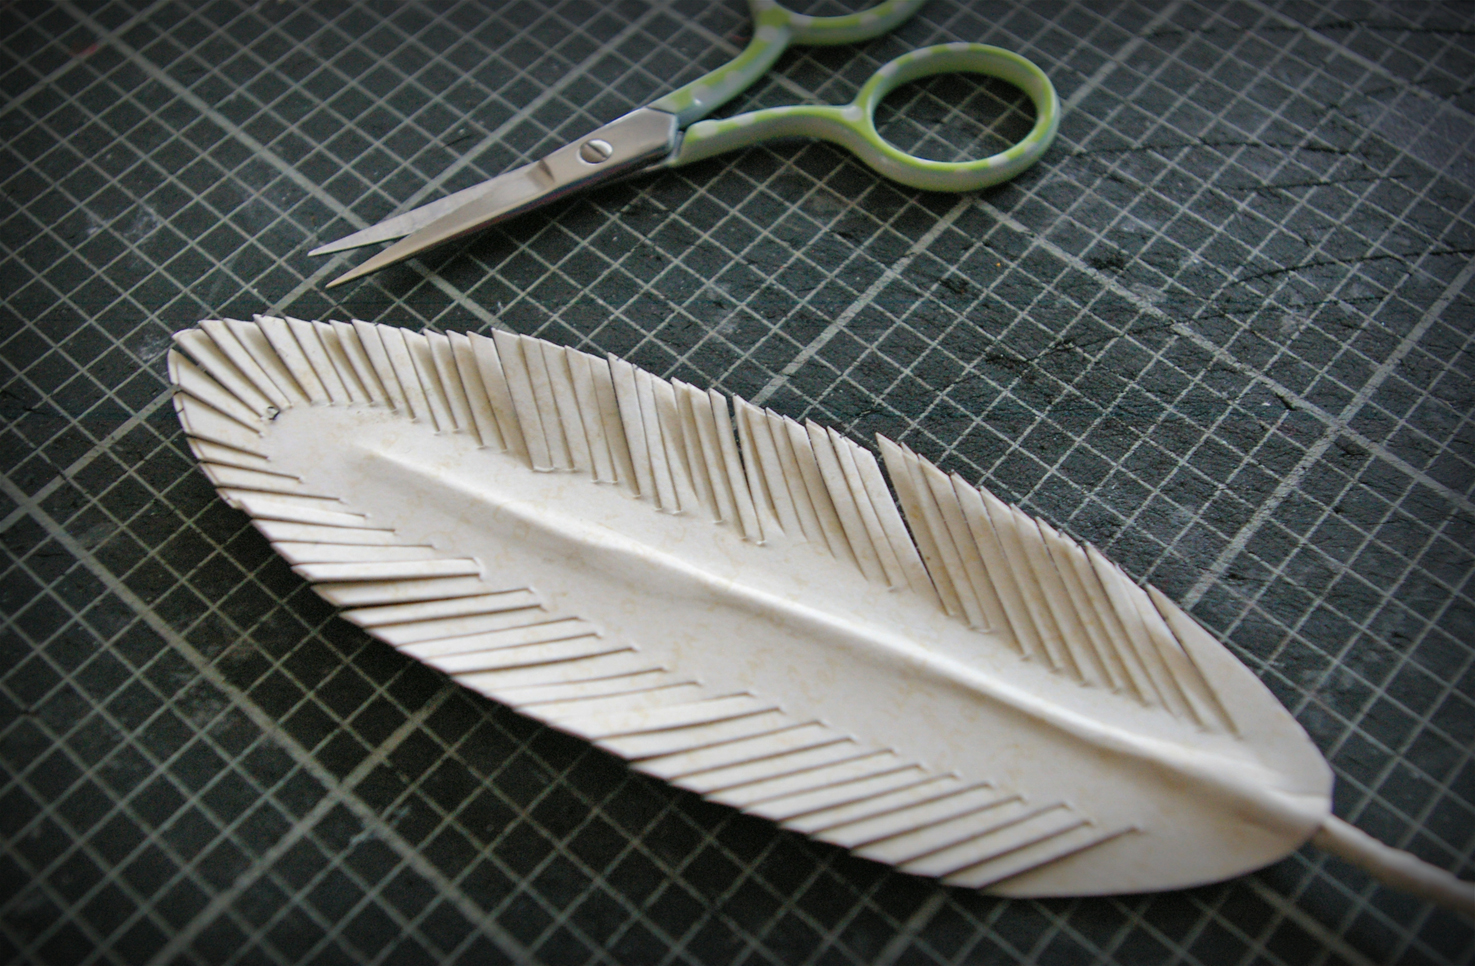
Firstly cut 2 feather shapes from patterned paper. Use the first as a template to make the second.
You could use craft wire, but I used a paper clip as I had them to hand.
Straighten the paper clip and then cover it by winding a thin strip of patterned paper tightly around it. I used a little bit of Tombo glue on each end to hold it in place. You only need to cover the part of the wire that will be sticking out the bottom of the feather.
Stick the wire to the centre of one of the feather shapes, and stick the other on top. I used a bone folder to make sure both pieces were stuck securely each side of the wire.
Make snips all the way around the feather shape, close together, and leaving a space in the centre.
The piece of paper I used was very subtle in it's colour and pattern, so I used some mists to add a little more interest. To get the darker blue around the edge of the larger feather I sprayed the mist onto a sheet of plastic and dipped the feather in.

Jenny has been really lucky and looks truly wonderful being pregnant. As soon as I saw this photo I knew it had to be scrapped.
I loved the shapes of the black and cream paper as they reminded me of a pregnant tum. I hand cut a few of the patterns out, and filled the spaces with other patterned papers cut to size and shape. I used one of the cut out pieces as a template to make a journal spot from a lined piece of patterned paper.
I used the same pink thickers and painted them a red/orange before drawing hearts and spots with white gel pen and covering with glossy accents.
I really hope that you like what you see and I've inspired you to go feather crazy. If you take inspiration from what we share, we love to see your work. Please leave a link to your work and I'll pop by and take a look.
Back tomorrow with another couple of LOs for the mum to be.


Wednesday, 7 March 2012

February Challenge Winner!

Well, you certainly went to town with our movie-themed challenge for February! Thank you to all our participants for your fabulous entries:

Of course, there can only be one winner, and we are excited to announce that this month the DT chose:
Natalie Jane

Congratulations Natalie! Please drop Sarah & Lianne a line at liannemail@sarahscardsltd.com to claim your £20 evoucher for the shop :)

The challenge for March will be set on the 10th, so be sure to pop back then for Ifa to share the details!

Saturday, 3 March 2012

Pretty Pebbles

I love the colours in the Pebbles Floral Lane collection. The colours are gorgeous, and there are so many variables within the collection it makes it very versatile. I also got my hands on the Studio Calico butterfly mask, which along with the Pebbles Fresh Goods - Dimensional Butterfly pack gave me an idea for a page!

This is my first page with which I have used the mask alongside one side of the layout, I used 3 different sizes of butterfly mask (there are 5 in the pack) on this occasion. I layered the papers and added 2 semi-circles for detail.  I adhered the dimensional butterflies, and used the gems to make antenna.


For my second page I wanted to make a handmade flower.  I spritzed the cardstock first then layered the papers at different angles.  After adding the photos I added a couple more butterflies, then made the flower.


First I punched out 3 flowers, and distressed each petal.


I then spritzed them with water first, then pinched each petal together to make them more pointed.


When they were dry I layered all 3 together.  I made the flower centre by rolling up the ribbon and securing with double sided tape.  Then adhering it to the centre of the flower.


Remember to share your pages with us, either as a link here on the blog or on our Facebook page!  I look forward to seeing your creations!


Friday, 2 March 2012

Adding some Zing! to Dear Lizzy...


The new 'Neopolitan' Dear Lizzy line by American Crafts is very 'me' and was really pleased to get my hands on some when it arrived in the shop.  I love the summery feel to the papers and the interesting graphics used in their designs: the polaroid pictures and jam jars are particular favourites of mine.

I find that when I really like the products that I'm  using, the layouts come easily.  This happened last year with My Mind's Eye 'Stella and Rose' line: I couldn't stop creating with the papers and am still hoarding tiny scraps of them.

I love paper designs with bits that I can cut out to make my own embellishments and the sheets that I chose from the new Neopolitan line were mainly ones that could be used in this way.

The jar stamp set also caught my imagination and I knew that I wanted to include the images in my layouts somehow.

My pages:
(click on the pictures to view larger versions of the images.  Then right click and select 'view image' which should then allow you to zoom in)

'You'
To create the background here, I made some splatters with a few different coloured mists to match one of the parts of the papers that I had used to mat the photo.  I then stamped the star and heart using versamark and then covering with some co-ordinating embossing powders to add some gloss and texture:
I also machined-stitched some zigzags to match the chevron paper and to draw the eye around the page.

'At the Beach'

The background effect on the cardstock here was created by spraying a mix of mists to create a sand/beach type look.  I stamped the stars and embossed again in matching colours:

I cut out some of the polaroid images from one of the papers, choosing ones with colours and designs to match the beach theme of the page.  One was embellished with a sticker whilst the other two acted as a base for the typed journaling strips:


'I Love You Three...'

I absolutely love the jar stamp and have lots of ideas for how to use it.  For this layout, I stamped and embossed in cream.  I then filled the space in the jar with mod podge before dropping on some punched hearts.  I repeated this to add another layer and some more depth:
 
The sticker sheet has a great selection of word stickers, perfect for adding to titles.  I cut out the word 'three' twice using a couple of the different papers.  I arranged them so to give a shadow effect before painting the top pink word with mod podge and sprinkling with a light layer of pink and white glitter:

So from only four sheets of the Dear Lizzy papers and a couple of sticker sheets, I've created 3 pages and still have plenty left to make lots more.  I also wanted to demonstrate that whilst these papers are particularly girly they can still be used on boy pages too.

We'd love to see what you create with the range, and indeed any of the items that you purchase from the shop.  If you're on Facebook, feel free to share your creations on our page.  They may even be chosen to feature on the blog here too.


Click on the links below to go straight to the products in the shop.  

NB. Restocks of the Dear Lizzy products are due in to the shop very soon.