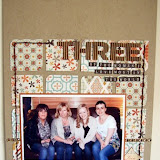
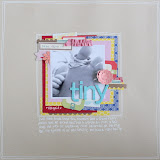
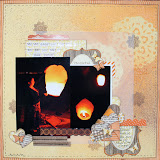
Every month each member of the design team will be working with goodies available from the shop, to bring you fun, inspiring projects. There will be step-by-step classes with photos, off the page projects and challenges where you can win stash or vouchers to spend in the shop.
We will be working hard to make this THE place to visit to get your creative juices flowing and your mojo buzzing.
If there is something you would like to see included on the blog, please let us know. We know many of you visit the blog on a regular basis so we would like to see you comment too. We also want to see your work, if you take part in a challenge or are inspired by something we have done, please leave a comment and a link to your work. Our promise to you is that we will comment on your blog or gallery.
If you like what you see, tell your friends to come and have a look too.
So here we go... I get to post first... lucky me, Yay!
At the March Sarah's cards Retreat, I created a LO that many people commented on, and lots of people asked how I did it. So here is a step-by-step to creating your own unique background... the way I do it.
Choose a patterned paper that you like. It doesn't matter if you don't like the colour, it's the pattern/design that is more important for this technique. I chose Pink Paislee, Daily Junque, Tabs, because of the bold design, and also the intended theme of my LO.
I painted the whole sheet with watered down white acrylic paint.

Once the white paint had dried I added a layer of watered down yellow paint (you can use any colour). I didn't completely cover the whole page, as I wanted to let some of the white show through, and I really like the patchy random effect.
 I then lightly sprinkled some embossing powder randomly over the LO. I used American Crafts, Zing metallic teal powder... although with all the fab colours in the Zing range you really are spoilt for choice. I heated the powder from underneath so it didn't blow away.


I then added a sprinkling of red powder, heating from the underside again. And once that was dry I brushed over part of the page with watered down blue acrylic paint.
 Now comes the really fun part. It's time to go crazy with stamps!!! I used the Pink Paislee, Daily Junque clear stamps and a Jenni Bowlin seal stamp. I stamped randomly over the page using black ink, and used the teal embossing powder on the seal stamp.

I like to overlap the stamped images, and use scrap paper to remove some of the ink first, so that some of the images appear more faded than others.

Once the ink had dried, I got messy with some Maya mists, I used yellow, red and hydrangea blue, but any colours can be used. I misted lightly from a distance and then sprayed at close range to get an intense splodge of colour in certain parts.
 Once the mists had completely dried I stamped circles onto the page, using pen and glue stick lids dipped in white acrylic paint.

I finished off the background by adding some blue drops of mist. To do this I took the spray part of the bottle out and tapped it over the page.

Once the paper is dry it is ready to use as your background for a LO. I cut it down to 8.5 x 11, choosing which part of the page I liked the best. On this LO, I used some of the spare to create some bunting to add dimension to the page. I used a 2 inch circle punch and simply folded over some baker's twine and stapled into place. The bunting was completed with some of the fab Jenni Bowlin flag banner stickers. I also used a Jenni Bowlin bingo card, and a section cut from this paper, to complete the LO.


I love getting messy and experimenting with mists and inks, and the great thing about this technique is that you never have to worry about not having paper to match your photos.... you can create your own. Have a go, you might surprise yourself and really love it too. Post a link so I can see what you've created.
The next LO I created used mists and stamps, but was not quite as messy as the last. I started with a sheet of white Bazzill dotted Swiss. I used yellow and lime mists, using a scrap sheet of acetate to spray against to get the striped sections. Where the lime mist pooled on the card, I used a drinking straw to blow the 'grass' effect.


I used the Pink Paislee stamps again, this time going for a much more subtle effect by using yellow and green inks, to produce a barely there image.

I stamped on the background using these My Mind's Eye stamps with baby pink ink and used the teal embossing powder to partially cover the image. I really liked the effect of the pink and the teal mix, so used it again to stamp my title.

White embossing powder was used on the seal stamp, and when I cut the shape out, I used the card scrap as a stencil to mist the seal shape over the layered images in the top corner, these images were cut from this October Afternoon paper, and this Pink Paislee paper.

Still with me? This is turning into a mammoth post isn't it? I'm fearing that I might lose all feeling in my backside by time it's done!!!

The next LO I want to share, is a nice, simple clean LO... I don't want to scare everyone off with mists and paints... although there is some more embossing! I used papers from October Afternoon, 5 & Dime, and this one from the same range, and Pink Paislee, Daily Junque.

I used the Pink Paislee stamps with versamark ink and the teal embossing powder, and the Seal stamp with versamark onto kraft card.

I made the little sandcastle flags using scraps of paper stuck to cocktail sticks... much cheaper than buying the pre-made ones, and you can make them to match your LO perfectly. I completed the LO by adding some Studio Calico rub ons, and added the title using these Thickers.
Onto my last LO for this post.
 This rather fetching photo was taken at the March retreat... I think myself and Nat, rock the whole moustache look to be honest... lol! As soon as I saw this photo I knew it had to be scrapped using the Hambly frame wallpaper overlay. The overlay is so gorgeous on its own that I decided it only needed complimenting with left over bits of paper from the above LOs as well as some of this Crate paper, cut to fit the shapes of the frames. I used circle punches and hand cut novelty moustache shapes, to embellish certain frames, and used one of the book spines from this Crate paper. The title was added using a mix of foam thickers.


Well that's all from me, for now... I hope you like what you see and are inspired to go and try out some of the techniques demonstrated. If you like what you see leave a comment to let us know, and please post any links to share your work with us. I look forward to visiting your blogs and galleries.
Louise
x