Like everyone, I totally love the little wood
veneer shapes from Studio Calico and the interest, dimension and texture they instantly bring to a page. They are great value for money as you get lots in a packet, the actual quantities varying between the designs. You get so many, that I knew by the time I'd used them on a few pages in their natural wood form, I'd be itching to see if I could transform them in any way to change up their appearance on my pages; adding an extra bit of va-va-voom to the veneer!
My first experimentation involved using Washi tape - I was excited by the prospect of using their pretty little patterns to brighten up my veneer shapes. Of course, their stickiness makes adhering them a total cinch - here's how I tackled it:
I began by laying my shapes straight onto my chosen tape. I trimmed it down, and burnished the washi tape onto the veneer shape firmly with my fingers.
Using a small scissors and a craft knife, I trimmed any excess tape away.
A little tip for the middle of the camera shapes - I found the barrel of my craft knife was perfect for getting the fiddly centre pieces stuck down firmly and achieving a nice round hole.
I covered the cameras in just one pattern each, but decided to try covering some shapes in a combination of tapes. I found for this that laying the tape on top of the shape worked better, as I could control the amount of each pattern that would be visible on my final shape and change the effect of the overlapping tapes if I wished. This was particularly handy when I used a bicycle tape and wanted to ensure that the bike was central to the wood shape.
After pressing the tapes firmly top the shapes, it's just a case of simply turning the shape over and cutting away the majority of the excess tape with a scissors, and neatening it all up and attacking any fiddly areas with a craft knife.
The beauty of Washi means that you can't really mess up - if you don't like it, you can just peel it off and start again - perfect if you like to fiddle around and experiment like I do!
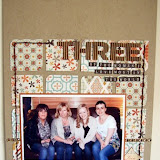
Here's how I put the camera shapes to use on a page, using some of the lovely Heyday papers from Studio Calico (don't forget to click on any images for a closer look):
I decided to use some veneer people in their plain state in the end to echo the natural feel of camping, but layered them up with a tiny star to make it look like they are holding hands......awwww ;)
Washi tape did come further in handy though...... I printed three photos off and for some reason one came out a little smaller than the others which was bad enough, but then I went and mucked up chopping the border around the edge which meant I had no choice but to chop it all off - leaving my third photo noticeably narrower than the others! I couldn't be done with the hassle of reprinting, so decided to overcome this by lining up the right hand edge of the photo with the others, then adding a strip of washi tape down the left side to make up the shortfall in width.
I think it worked quite well to balance the design, plus it acts as a
hinge, allowing me to use the area underneath the photo for some extra
journaling that I couldn't have fitted in otherwise. Bonus!
I added a veneer star to the corner of the photo to make a tab to lift it to avoid damage to the photo:
The page marks what I hope to be the start of a few which document a recent little break Mr T and I shared (I took over 500 photos in 5 days - so I suppose I better scrap some of them!!). It was only a camping holiday, but it was to a beautiful place that I wanted to share with him, and it was the first extended break that we've taken where it was just the two of us. I'm no good with minibooks (I have a stock-pile of incomplete ones to prove it!), so thought a few pages that I can complete at my leisure but store together in one section of my album would be perfect. I want there to be a tiny theme running through them to unite the pages - so I decided to create a simple day of the week marker that can be added to each page, so we can remember which day of the break we did what.
I grabbed my fave MME days of the week stamp, and worked out roughly where I wanted it on my page. This layout was for Friday, so I popped a tiny tab of washi tape where Friday would be stamped. I loaded up the stamp with some brown Stazon (perfect for the slightly shiny finish on the washi tape), and pressed the image down on my page, ensuring "Fri" hit the tape. To further highlight the day I added a tiny star to the corner. This can easily be incorporated into all my holiday pages, and the tape can be changed to suit the colours and patterns on each page.

To finish the page I added a cluster of stickers and rub-ons that have been hiding in my stash for longer than I can remember, along with a Basic Grey What's Up tin pin, and a strip of the fab "date" washi tape from My Mind's Eye new Sweetest Thing Honey collection. I think it's going to be used A LOT - such a quick way of adding a date to a page, and as it has a repeating pattern or yellow, pink and brown date tabs there's one for every page. You need a good permanent pen to write on the shiny surface - I used an American Crafts Slick Writer.
Next in my venture into veneers, I thought about stamping on them. I wanted a subtle impression so had a go with Versamark watermark ink first - but this was too subtle to be seen from anything over 3mm away! Embossing this with some clear powder may be an interesting effect though - which set my mind wandering.......but first here they are stamped in brown stazon:
This still looks quite natural I think. And the great thing is, as they are made of veneer, if you're not happy with what you've done, nothing is lost as you can simply turn them over and use the other side. These have got the mixed strips of Washi tape on the reverse - who knew?!
I was a little excited by the thought of embossing the shapes....I had a layout in mind that I wanted to have a warm, fun feel to it, and wondered if I could make some coppery embellishments to match.
I took some of the girl shapes from the people pack and smothered them in sticky Versamark, before sprinkling a mixture of gold and copper embossing powder on to them. I used my fingers to sprinkle it as I wanted to get a mixed molten-metal finished result, with the two colours mixing over the surface:
Working on one at a time, I created a polka-dot or chevron effect on each. This was done by building up layers of the embossing powder to three in total, and then while it was still hot pressing an embossing folder into them.
A rubber stamp is usually used to create the texture, but I didn't have
a polka dot or chevron stamp - so improvised with what I did have! You have to work quickly, so heat embossing one shape at a time is the way forward. Here are my finished metal-effect charms:
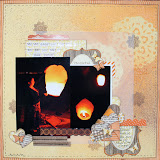
And here's how I used them on a page recording my stepdaughters' recent birthday celebrations with us, along with a mix of SC Heyday and Crate Little Bo Peep papers:
While the embossing powders and washi tape were out - I used them to alter an ordinary steel paper clip to a gold coloured one to match the page and added a washi ribbon:
Strips of different washi tapes also made a great base for my journaling:
And helped hold a large number 5 cut from one of the Heyday designs to my page
A subtle title using some Pink Paislee tiny alpha stickers on top of a Hambly label and a row of punched hearts completed the page.
And that's it! Have you got any beloved items in your own stash that you can stretch or give a new spin to by altering in some way? We'd love to see :)
My supplies included: