Thursday, 19 April 2012

Amy Tangerine Wow

I adore the New Amy Tangerine Sketchbook collection, I had one of everything and thats very rare for me. If you haven't already seen it you need to take a look at this inspiring colourful collection HERE

If you find it hard to work with bright colours try using small amounts against a dark background and it will really make your colours jump off the page.

Along with using Amy Tangerine I decided to try some stamping.. I really am a hopeless stamper, I think i'm a stampaphobe.

While at the recent Sarahs Cards retreat I swooned over this amazing background stamp from Studio Calico/Hero Arts I think these were flying off the shelf.!!

Rather than using ink I decided to try acrylic paint as I wanted to stamp with white on my black cardstock and wasn't sure I could get it bright enough using an inkpad.. If you are going to try this apply a thin layer of paint with a sponge and wash your stamp imediately afterwards to make sure it doesn't get clogged up.

Here's a page I have made using the stamping technique and Amy Tangerine Sketchbook collection.


Products used:

Rainbow Ribbon available from Sarahs Cards but not on the site 
White acrylic paint
Amy Tangerine Sketchbook -


Monday, 16 April 2012

Vanilla Sunshine

Mmmmm as soon as I read the delicious name of this release by SEI (it sounds like some sort of warm, heavenly cake to me!!), I knew I'd have to order some bits and have a play with them! Over the next few days I will be sharing with you a few pages I have made with it, but today I wanted to show you what I did with the gorgeous fabric swatches in the range:

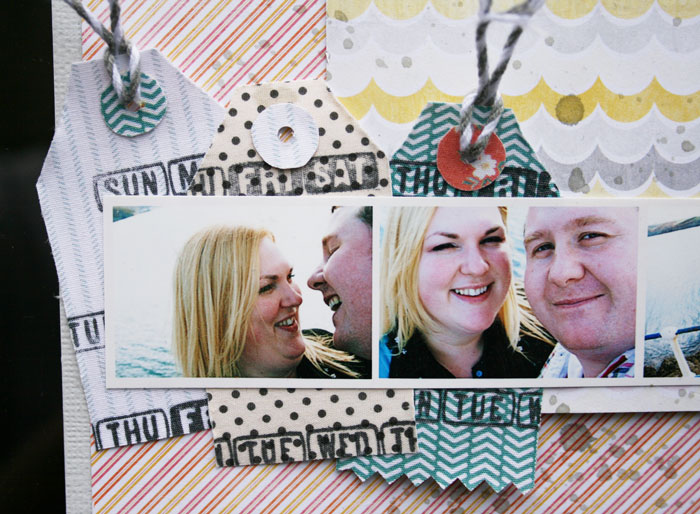
I decided I wanted to make quite a simple page, but use the fabrics as decorative tags that really draw the eye to the details:
You can see how I used the tags to matt my photos here:

I began by choosing a few different fabrics and cutting thm to my desired size. As the fabric is backed by paper, this is really easy and no specialist fabric scisors are needed to cut them. Similarly, they can be stuck with your usual prefered scrapbooking adhesive - I used repo herma. I left the pinking-sheared edge to the bottom of two of the tags to add a bit of interest:
The title of my page was "I Love You Every Day," and I had subtly stamped the days of the week all over my base page with a Versamark pad. I wanted to add this in a more dramatic way also, so, using the same stamp and Stazon ink, also stamped the days of the week randomly over the fabric swatches.

I removed the corners from the top of the "tags" to give them the conventional luggage-tag shape. I also cut a circle from a contrasting pattern, and stuck it to the top of the tag as a reinforcement ring, chomping through both layers of fabric with my cropodile to make the tag hole, throgh which I looped some twine:
My custom tags continue my "everyday" theme, draw the eye to the details of my page and add texture to my layout.
The final tag played host to my title, along with an Ocober Afternoon Little Flyer banner and some Amy Tangerine tape.
What fabric touches will you create for your pages?

I'll be back over the next few days with some more Vanilla Sunshine, plus some tips and tricks for creating popular looks quickly using the good ole square punch - dust them down ready!!
My Supplies Included:


Thursday, 12 April 2012

{Ribbon Love}

One stash item that I constantly seem to be buying is ribbon - I love it in all colours and styles, and use it on my pages a lot. I've noticed that a few people have mentioned to me that they too love ribbon, but they struggle to use it on their pages, so I thought I would show you a few ways in which you can use up your ribbon and make it a starring feature on your page. 

This bulk buy ribbon pack from Amy Tan's new collection 'Sketchbook' caught my eye immediately - who could resist such a plethora of beaturiful designs and bright colours?! Not me! 


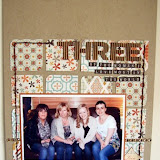
The first way I've used ribbon is as a substitute for patterned paper. I used a neutral background so that the colours really stood out. I stuck my photo down, but didn't put adhesive right up to the edge of it, so that I could slip the end of the ribbon under the photo at each side. Then I simply glued strips of ribbon all the way down the edge of the photo and roled them over the edge of the page. 


This photo is of friends having a lovely time together, and it makes me happy, but paired with ribbon it makes me super happy! You could get a similar effect with a piece of stripy paper, but you might struggle to find one with various designs and colours that are just right for your photo. Look at all that colour - fabulous!


My second page focuses on the more subtle shades of ribbon in the pack - there are some lovely tone on tone designs in an off white/pale grey colour, which I've paired with a snowman photo and a dash of orange to complement the carrot nose in the picture! All my elements run down the centre of the page, and I used ribbon as my main embellishment.


Rather than having just strips of ribbon, I took two different patterns and tied them together in a knot. Then I cut them to length, making it so that the knots vary in position under the photo.Small details like cutting a triangle from the end of the ribbon give a finished look. I find runner adhesive like Herma or American Crafts runners to be the easiest way to ashere ribbon to the page, and very effective.


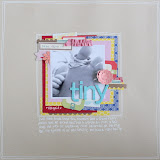
The third way I've used ribbon on my layouts today is by creating a banner for my page. I picked a few designs that complemented the shades in my photos of my little boy showing off his first sign (now in constant use, as he always seems to be hungry!!). You only need small pieces of ribbon for this, so it's a great way to use up ends of rolls, or little bits that are left over after another project.


I cut small pieces of ribbon in varying lengths and folded them over a piece of twine, stapling at the top to keep them in place, and cutting the ends into flag shapes. I stuck the banner down using small bits if runner adhesive under the ribbons to stop them from moving out of position.


All of these techniques are things that you might otherwise have done with patterned paper instead, but I love the added depth ribbon gives to a page, and how tactile it is on a completed layout. Why not ry substituting some paper with ribbon on your next page?


Tuesday, 10 April 2012

April blog challenge

Hope you all had a lovely Easter and have not over indulged too much in chocolate eggs and hot cross buns.
Are you ready for our new challenge?
This month Tracy has designed a sketch for you, which a few of the design team have already had a play with and come up with some stunning samples.
All you have to do to be with a chance of winning a £20 e-voucher is create a layout or a card following the sketch  (remember you can rotate or flip the sketch as long as we can see the basics of the original sketch in your design), then just link it up below.


Tracy
I have used DIY Thickers and WOW glitter on the hearts and my title.


Jen G
I love how Jen has made a glittery heart in place of the circle.


Tracie
I really like all the different lettering Tracie has used in the title.


Lou
Such a cute baby! The white strips across the bottom are for the new Mummy to add her journaling.


Loving the raised clouds and doodling around the stars.


Helen
I love the circle of circles on this one.


Vanessa
Wow, look how Vanessa has used the papers to give a hint of the Union Jack.


Claire
Look at those gorgeous handcut flowers.


We look forward to seeing your creations.