Wednesday, 10 August 2011

August Challenge

Hi all its Rachel again, so it is my turn to host the monthly challenge. So this month what I would like you to do for a chance to win £20 e-voucher is to scrap using 5 patterned papers.

They can be different manufacturers but we need 5!

This is my page, using up some old Crate


So as you can see 5 patterned papers, i have used the backs of the papers but welcome to use anything you like.

This is what the rest of the DT got up to


Love this colour combo from Claire


Gems completely gorgeous little girl


Stunning wedding layout from lou


Nats is super loved up!

 You have until the 31st of August to get your entries in, just leave us a comment with a link to where your layout is and we will go and check it out.

Chance to win £20 to spend in the shop, for one layout!

Go on you know you want to

Rachel x


Monday, 8 August 2011

Challenge winner.

We had loads of fabulous entries for July's sketch challenge, it was really difficult choosing a winner.
Thank you to everyone who played along with us.

The winner of the £20 e-voucher to spend in the shop is Jackie.
We all loved the grungy feel of the LO, so a big congratulations to Jackie. Contact Lianne to receive your voucher, and happy stash shopping!!!

Rachel will be back in a couple of days with the challenge for August.

Sunday, 7 August 2011

Part 2- Lifting vs Stealing

Hi all, anyone out there on this rainy sunday? I thought i would come back and show you some more of the pages i have been doing on my little feature of lifting peoples work without directly copying.

 So as we all know copying is the biggest form of flattery right? well thats what my mother told me growing up.

I totally fell for this page when i saw it and quite just wanted it the same, everything in the same place etc

That is totally fine so long as you credit the 'designer' so here i went.


Pretty much the same right? i even used the title (titles are hard) it just so happens i had a sticker from Sassa that had love love love on it


I love the folded up paper bit


I also tend to use our R&R on loads of things.

So there you go, its pretty much just copying, though obviously i didnt have the same stuff as her.

I mainly used Sassa stuff, a bit of MME ahh cant think what that coloud paper is but its cute right?

So my final page is lifting Gems lovely page she did on our first round of 'new look' blog work


I loved the composition of this page, thats what i tend to see first rather than what people have used etc

So off i went to lift her work, again using mainly MME (cant get enough of it) bit of Crate and a bit of Sassa 


I started with these super cute bunny photos but it started to change and i thought a big one would be fun, this is exactly what lifting is about, taking a idea and changing it.


i kept the idea of a photo and a little one as a highlight


I liked the bit above the photos with the title so added a sub title to my page.

So you can see again how if you look you can kinda see where it originally came from.

So there you go that is me for now, i will be back in a few days actually as it is my turn to host the monthly challenge where a £20 gift voucher can be won.

Thanks to all the DT for having such wonderful work and letting my use it.

Thanks for stopping by, be sure to link up any work you are lifting and i will swing by and see

Rachel x

Saturday, 6 August 2011

Lifting vs Stealing

Hi guys Rachel here, so i had a little idea for a blog post. I dont know about you but sometimes i need a little help to get my mojo going, you can stare for ages at a piece of paper and not think of anything.

So i thought i would show you how i lift things, now this post certainly isnt to stop using the dt's ideas or the booklet that comes with the kit but to show you how you can 'lift' and change little bits.

I have used stacks of different products for this post.

sassafras sunshine broadcast papers
You know when you see someones layout and you are like, oh i want it, so off you go to make one, well i thought that when i saw this


This is one of Jens pages from the April kit and its cute & lush. So here is what i did to have one of my own.

I 'lifted' the portrait photo and the general composition of the page, but did it backwards and did everything on a angle.


Something i added was these beauities, they are by Maya Road, they are just chipboard colour but i used my fabby new mist- Iridescent pearl (if you were at the March retreat you will know how crazy people went for this 'colour' '
I sprayed them a few times and they look so pretty 


I loved the section on Jens with the ribble effect on the cardstock, again we got ribblers at the March retreat so i thought i would bring that to my design too.


These chipboard bits are from a really old sassafras pack, im into using up old things at the minute.


This collection of paper is completely gorgeous, its so neutral and i dont normally do neutral but i completely love it, perfect for girl/boy etc


So there you go while it looks similar its not identical, if i blogged this i would link up jens blog  having taken inspiration from her work.

So next up is....
Lou's page (lou helpfully hasnt blogged this but i think its from the latest kit)


I love multi photo pages so it thought this would be perfect, so i got started.

i used Sassa again for this page, a bit i love out of the collection is these banners a 56 piece cardstock stickers, i used them on nearly every page and have stacks left.


So you see i have used the multi photo aspect & bunting bit, so again while its not identical you can see that i have 'lifted' chances are if Lou read my blog she wouldnt notice but its always nice to hear someone liked your work so much they have used your work to help them along.

I used my trusty new mist again on this page


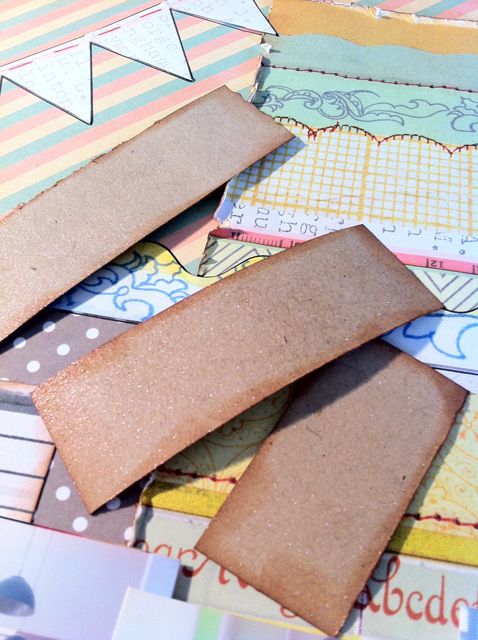
I was going to put my title on the patterned paper but thought it might be a bit lost so instead of just sticking them on strips of card, i did a bit of inking around the edges and then a bit of iridescent misting cute right?

So i thought i would end todays post with a complete steal!

I loved this page  by Claire


I have used a crazy mix of papers here
MME (used seen the new papers right)
Sassa
Jenni Bowlin bingo cards 
(im sorry my links are terrible my mouse and my keyboard are not happy)


So you can see here its a 90% 'steal' obvs i would link vanessa up on my blog.

I think i will leave it there for today and be back tomorrow with another lift and a couple steals, i hope this has helped in looking at a page and seeing how you can keep some things the same but change some things at the same time.

Thanks

Rachel x

Tuesday, 2 August 2011

Still resisting...

It's Louise again... back with another LO to share.
Continuing with the mist and resist theme, here's a little step by step on how to create layered details to add to your LOs and cards.
If you're interested in having a go with the Maya Road Resist, but are unsure about applying it freehand.... fear not, here's a super easy peasy trick to get you started.

Use a clear ink pad to stamp your chosen image (simple designs will work best).
 Then simply apply the resist carefully over the stamped image.
 Once the resist has dried use a circle punch on scrap paper to create a stencil to mist through.
 I used yellow.
 Use the punched circle to cover the area you have already misted.
And use a different colour to mist again, I used lime green.
I sprayed from the side and the paper circle moved slightly... but I really like the graduated colour effect.... sometimes happy accidents are better than the intended result.
 I then placed a star over the design, and misted lightly with red.
Once the mist was dry... and remember it must be COMPLETELY dry if you don't want to peel of the top layer of paper, I used a circle punch and selected the area I wanted to use as an embellishment.
See... it's really that easy!
 Here's another I did but swapping the colours around.
Another great way to create added interest when using mists, is to use clear embossing powder. I used my favourite Jenni Bowlin stamp then sprayed over with red. I gave the embossed area a bit of a wipe over with a baby wipe just to get rid of the excess colour.
You can see clearly in this close up how I used the resist to block out some of the stripes in the patterned paper, so that they stayed the original colour.
I completed he LO with a couple of Studio Calico wood veneer stars, one stamped onto using the new Jenny Bowlin Ruler border, and the other had a coil of baker's twine stapled to the centre. I inked the edge of a ruler to stamp some red lines across my fabric thickers title... they just looked too white left untouched!

I hope this little step by step has inspired you to get resisting and misting. Please leave a link to your work in the comments box... we'd love to see what you create.

Lou
x

Monday, 1 August 2011

Must resist...

Wow, I can't believe another month has gone by so quickly... and here we are again, with my turn for a blog post!
This month I have been playing with the Maya Road Resist. If you love the mists, you really must have a go with the resist. It has a super fine applicator so you can be really precise applying the resist, and unlike the resist medium I used in Art collage, it has a wire in the lid to prevent the applicator from blocking up when not in use.
The first LO I have to share uses the resist to create a background. I started out with white cardstock as my base.
Using the resist I wrote my title freehand onto the card, and drew a few doodle flowers and added some random spots here and there. You don't need to worry about making a mistake, as anything you're not happy with can be rubbed off really easily.

After the resist dried (about 10 minutes depending on how fine you have used it). I hand cut a couple of butterflies to use as masks, and placed them where I wanted them, before spraying with cream and yellow mists.
 I also used the paper the butterflies were cut from as a stencil to spray over, using orange.
I know it wouldn't do for a lot of people, but I really like seeing the straight lines created by misting along the edge of a piece of paper... in this case the butterfly stencil. I used the same technique to add some teal stripes to the top of the LO, using more butterflies as masks.
Once the mists have COMPLETELY dried, you can pick off the resist. It's VERY important that you do wait for the mists to be dry, or you can take off the top layer of paper with the resist. I like the effect this can cause, but if you want the design you have drawn on, you need to be patient and wait. I use my finger to rub the resist away... it's easier than faffing about with tweezers or other tools!
I built up the LO by adding a strip of this Pink Paislee paper, with some squares cut from this Studio Calico paper. I used the wood veneer stars as they were, before looping some aqua baker's twine randomly across the page. I used my trusty Jenny Bowlin seal stamp with Zing embossing powder in butter, as a sun. In between the teal mist stripes I stamped with the Jenni Bowlin ruler border stamp, using a butter coloured ink for a very subtle, barely there effect.
The LO was completed with some bunting cut from a misted piece of white card, attached to baker's twine, and a few punched butterflies and some Adornit alpha stickers.


I love how easy it is to write using the resist, and used the same technique for my title on my next LO. I used this Pink Paislee paper as my background, and wrote the title going round the corner in my best joined up handwriting. I used a punched circle and a wood star as masks, to create the fun detail over the top of a Sassafrass cloud sticker. I like playing with layers of mist, to add interest to LOs, it's fun and very random, and you can create some beautiful results... why don't you have a go and share your work with us, by leaving a link in the comments box.


Well that's all for now... I'll be back soon with another LO to share.
Happy resisting...
Lou
x