Sunday, 2 December 2012

Mixing old with new.

 
Hello all. Welcome to December! I can't believe Christmas is almost upon us. My boys have started to get very excited although my enthusiasm needs to catch up a bit!
This month I chose to work with the Simple Stories Snap Colour Vibe 12x12 Paper Kit. I love the colours and the patterns in the kit, and thought that they would be perfect to use with a mix of different patterned papers. After being a scrapbooker for so long I have a massive amount of paper 'scraps'. This box is full of just some of the left over papers I have, and some of the scraps have been in there for years!
So I set myself the challenge to use all of the colours from the Snap collection with only patterned paper salvaged from the scrap box of doom!
 
Last month I shared a LO recording my weight loss so far. One of the reasons why I have been successful this time round is because I have started running. I started the Couch to 5k training with a couple of friends in the summer, and honestly never expected that I'd stick with it, or ever be able to run 5k! However, stick with it we have, and we laugh in the face of 5k now! As the weather got worse the running moved indoors into the warm, dry and well lit gym. I now run 10k a few times a week, and am loving it.
At the start of November Virgin Active clubs nationwide held an indoor triathlon. Paul and I signed up for the supreme event, and although we support and encourage each other, we are also very competitive. After completing the run, cycle and swim, our scores were added up and Paul had beaten me by 30 seconds. It was only the next day when the times went up on the website that we found out they had been added up incorrectly and there was actually only 10 seconds between us... and I had won!
I did a LO for me to record this achievement, and that will be up when the December sketch challenge goes live. Here is a LO I did for Paul. I used the turquoise papers from the Snap collection with a mix of papers with star patterns and red as main colour. The certificate was printed small so that it could be included on the LO too.

 After cutting three stars from the dotty paper I inked the edges in  black.
The stars were also added to the LO but with the chevron pattern showing on two of them.
As well as using up some of my scraps I also decided it was time to have a rummage through my stamp collection and use some of them that had been untouched for ages. On this LO I used a cool chevron stamp from an American Crafts set, and some alpha stamps I've had for donkeys years!
 
My next LO celebrates another achievement... Movember! A friend of ours decided that he was going to grow a moustache for Movember and Rob decided that he would too. There have been many jokes throughout the month which resulted in me buying a couple of sombreros for an end of Movember photo shoot.

 
For this LO I misted and stamped some white card stock, before using a strip of the grey striped paper. Picking out colours from the sombrero I added a couple of strips of paper from the scraps, and also used some of the pink paper from the Snap collection. I found some left over moustache paper and added a little strip of tashes along the bottom of the LO too.
I used a number of stamps on this LO, from a coffee cup stain, to a WC man, and to a random pattern stamp that looked a bit like a moustache.


The larger moustache stamp was made using the Teresa Collins stamp maker machine... I'm still really pleased I bought this, its so easy to use.

 My next LO is about Drew's first day at nursery. I used the mustard Snap paper, with lots of scrap pieces that picked out the colours in the photos.
 I fell in love with this protractor stamp by Jenni Bowlin, and this is the first time I have used it.
I used a cursive writing stamp on to a punched tab, which works really well with the theme of the LO.
 
My next LO isn't a celebration, its more of a warning that even amongst fellow scrappers, you shouldn't leave your work unattended! At the November 2011 Sarah's Cards Retreat, the rest of the DT decided to add to my LO, and by the time I came back to the table, this photo of the main culprit was already on facebook... lol!
I used the green and orange Snap papers with scraps of the papers I used on the LO that was sabotaged! The 'add ons' were all included on the LO too.
 
I love how this wooden woman turned out... she was misted with turquoise and had a sprinkling of clear embossing powder added whilst the mist was still wet.  

I created the title in a word document, printed it in reverse onto blue card and hand cut it. I love this technique but rarely use it because of the time it takes. Sometimes though it's nice not to rely on Thickers or stickers for your title, and with this technique you can make the size of your title as large or as small as you want.
 
I thought for my last LO I should embrace Christmas. So I finally got round to scrapping the photo with Santa from last year... lol! The brown dotty Snap paper formed the base of the LO, with strips of red and turquoise mixed with coordinating scraps. 
I used a sewing machine to stitch the strips together, as well as stitching through the felt thickers.
I love adding random bits of stitching to my LOs. I used a contrasting thread on this LO, and love the turquoise against the brown and cream.
 
I have really had fun playing with the colourful Snap collection, and still have so much left. I hope I've inspired you to get rummaging through your scraps too... lets face it, we all have so many, we need to get them used up!
Hope you all have a fabulous Christmas. I'll see you in 2013.


Thursday, 29 November 2012

O'Christmas Tree

Hello ladies.  It is Ifa with you today.  I hope you are having a nice day and gearing up to your Christmas preparations.  If you are thinking about Christmas layouts, I might be able to help with some little Christmas trees.

I have been rumaging through some old photos. The first layout I am sharing with you features photos from 1999, when my son was just one.

 
The photos were from before I scrapbook.  I wish I did scrapbook in those days so I might have written down what he got for Christmas but I didn't.  In one of the photos, he was holding a monkey soft toy so I am guessing that was one of his present so my journalling went along this line.
 
I have decorated the layout with three little Christmas trees that I made with papers from Crate Paper Acorn Avenue. I know, not the traditional Christmassy papers but I like to be contrary.
 
I made the trees by punching out 1 1/2" squares...I used the little one from the twin Creative Memories Punch which I cut into 2 triangles.  I stacked them up and added some brown paper for the trunk. I then lightly glue the pieces so it is easier to handle.  I say lightly because I don't want too much glue clogging up my sewing machine.
 
 
I then stitched around the edges on my sewing machine.


I made a few and added them to my page.  I also embellish them with some pearls.

 
The second layout follows pretty much the same recipe, to create this layout. My albums are in chronological order and as the photos are from different periods, nobody is going to notice the similarity.


I hope you like them. Have a very good Christmas and I hope Santa brings you some crafting goodies. 

Tuesday, 27 November 2012

Same but different.

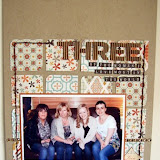
Hi Tracy here with my blog post for this month. Have you ever looked a paper range, and thought to yourself that they wouldn't work with your personnel style of scrapping? Well this month I'm going to show you two totally different styles of layout using the same photo, and products from My Minds Eye - Lost & Found III - Oliver, range.

My first page I would probably describe as having a vintage or shabby chic style, which these papers initially put me in mind of.
 For this page I have used a piece of the patterned paper as my background and layered up some of the others, using distress inks to age the edges. I did a little fussy cutting of the flowers for the cluster on the bottom left of the photo.


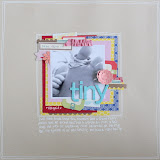
As you can see by my second page, just by using a few different  products from the same collection, you could just as easily create a clean and simple style of layout with lots of white space.
For this page I used mostly Washi tape and stickers, and cut my title on my Cricut.

 
Remember you can click on the photo's for a closer view.

I hope I've inspired you to look at the way in which you can take a paper range you maybe wouldn't usually choose, and still make it suit your style.

As always all the products I've used are linked at the bottom of this post.


Saturday, 24 November 2012

I Screwed Up...


... literally. I screwed up Washi Tape. The stuff is so amazing that even after it has been screwed up into a ball it will unravel and still be useable. Here's the proof:
 
This:
 and this:
were used on this LO:
The screwed up Washi adds lovely texture to the page.

On this page I had originally placed the washi in a flat strip vertically on the right of the patterned paper. Usually you can pull washi tape off a page easily but I think I was a bit too vigorous with it and it ripped the paper. It turned out to be a happy accident though, as I liked the effect. I used the screwed up effect with the washi tape again - adding texture to this page too.

Try screwing up like me then post us a link to your pages.


P.S.
Along with the Witch Hazel 8x8 pad I used the "Tidbits" pack. I was happy to discover that each "Tidbit" was double sided with wording on one side, but blank on the other. This means that all of the left overs from the pack can easily be used on non-Halloween layouts.


Thursday, 22 November 2012

Stars!

Its almost Christmas again!  I'm not normally one for using Christmas papers, I usually like to scrap Christmas layouts using non-Christmas papers and challenge myself to use Christmas papers for non-Christmassy layouts.

Today is no exception. As soon as my beady eye locked on the new Fair Skies papers by The Farmhouse Paper Company, I loved them and although they're nothing to do with the Festive season, that's what I wanted to do.

Firstly, my layout uses a collage photo created in Picasa (if you look back, Helen has done demos in the past).


The large star and stocking are hand drawn (well traced from pictures in magazines).  I've used the twine to do a bit of simple handstitching around the edge of the shapes.  The Thickers are covered in the extra fine glitter, which goes lovely with these papers and gives them a real Christmassy feel.


The little stars on the stocking are punched from an old small hole punch and then covered with glitter mixed with glossy accents.

I love making other little crafty projects and gifts, not just scrapbook pages.  The Christmas card below features the lovely bird stamp from the MME All is Bright collection, I've wrapped the star in the twine and used the glitter and glossy accents again.


And finally, a little gift wrapped with tag.  


A lovely little gift set. :)

Thanks for looking. :) 


Monday, 19 November 2012

Playing with Crate

Oh yes.. This month I got the beautiful Crate Paper On Trend to play with and I just adore this collection. It is pretty, bright, funky and very very usable.

I also chose a Very funky stamp from October Afternoon - Pinwheel to use on my papers.

Here are the layouts I have created;


For this funfair layout, I stamped very faintly with black ink just so i could see the outline of the image, I then sketched around the outline with a white pen and added red pearl drops to try and create the effect of lights at the fairground and the same with my title.


Fro this page, I went for pretty using the smae stamp and technique, i stamped using a pale chalk ink in a colour that complimented my layout and added white pearl drops around the outline.