Wednesday 28 April 2010

No More.

Lou has been getting creative with some Jillibean Soup New England Chowder and has put together this stunning page, we all loved how she used the woodware tab punch!
"These papers are perfect for scrapping pics of my boys... especially these ones of Harry wearing his favourite lorry top. I wanted to get some photos of Harry in this top... obviously to scrap wth these papers, but he was having none of it. The result... a much more interesting LO that shows the character of my ginger bear.I used the artisan tape as a mat for the corrugated alphas, and folded over as a kind of tab stapled to a journal sprout. I also stamped on a strip with the gorgeous Sassafras 'song writers' stamps.
To tie in with the corrugated alphas I used a paper ribbler to create mats to place behind the main photo. The arrows were hand cut from the patterned paper and added as a border to lead your eye around the LO. I ued the Woodware tab punch to edge a circle of pp, using scraps of card to coordinate... these could have names/dates added to if you wanted. I decided to fill the space with hand written journalling, to tell the story of the photos."

Sunday 25 April 2010

365 Degrees Class

I thought it was going to be a lovely sunny day here today but it is cold and overcast, perfect scrapping weather! I have put this class together using some of the gorgeous new Pink Pailsee 365 degrees.

You will need.
1 piece of kraft paper
Pink Paislee 365 degrees paper - imagine, daydream, think big.
Pink Paislee 365 degrees flip notes journal pad.
Punches - Martha Stewart classic butterfly and Monarch butterfly. Tab punch.
Jenni Bowlin stick pin
Adhesive pearls
1 small white brad
Orange embroidery thread
Small alphabet stamps
Thickers - delight and one other with a larger font.
Brown inkpad.

How To.

Cut two pieces of Daydream paper approx 5.5 inches in height adding a tab shape the the side of the right hand piece. Ink the edges and stick them onto your kraft towards the left hand corner.


Cut a rectangle approx 6.5x8.5 inches from the Think Big paper, distress and ink the edges and stick onto your page at an angle covering the gap between the first two pieces of paper.


Cut out a rectangle of Imagine paper approx 4.5 x 6.5 inhes, ink the edges. Bend the top left hand corner around a pencil or piercing tool and once you have stuck this piece down secure the corner using a small white brad.


Pull out a sheet of the Flip journal note pad, ink the edges and stick it onto your page. I have also added a punched tab to the left hand side of the rectangle.


I have used an old photo which measures 3.5 x 4.5, matt your photo onto the Daydream paper and distress the edges.


To create the butterfly you will need one monarch and one classic punched butterfly, a Jenni Bowlin stick pin, a piece of lace and some embroidery thread.
Ink the edges of your two butterflies, cut out a small section of the lace and using some wire cutters snip the sharpe end off the pin.


Layer them all up and secure the pin in place with some embroidery thread, I have fixed the embroidery thread on the back of the butterfly with a small piece of sticky tape.


To add the extra detail to the top right hand corner, cut a small strip of paper ripping one edge. Add a piece of lace on top and secure with some embroidery thread. Punch out two of the classic butterflies, ink the edges and stick them together. I always add a spot of silicone glue under each wing to give extra dimension. Stick a few adhesive pearls down the middle.


Add your title and journaling. I have distressed the edges of my kraft paper and also added an extra butterfly made in the same way as the one in the right hand corner.


I hope you enjoy the class and if you don't mind sharing your layouts we would love to see what you create, just add a link into the comments.

Wednesday 21 April 2010

New DT Member!

We are really pleased to announce that Lou Collins will be joining our design team, she is an extremely talanted scrapper and we can't wait to see what she creates with the kits. Take a look at her blog I am sure you will be impressed!
Before Lou joined our design team she won last months challenge, however now she is on the design team anyway we felt that it would be appropriate to choose a second winner. The design team have chosen Helsbells and her layout "learning to use the big swings". Well done Helsbells! If you drop us your email address we will get your £10 e-voucher over to you.
Here is her fantastic page.

Sunday 18 April 2010

April Sketch Challenge

Are you ready for another challenge? Rachel Ward has designed this great sketch and we can't wait to see what it inspires you to create. The design team have been joined by Lythan who won Februarys challenge and she has created a stunning page.
If you want to join in it is really easy, just create a layout or card based on the sketch and post a link to your creation in the comments box or email it across to sarah@sarahscardsltd.com by Monday 10th May. The winner will be chosen by the design team and you could be in with a chance of winning a £10 e-voucher and an opportunity to join the design team in creating an example layout for the June blog challenge that will be featured on the blog.


Lythan has created this gorgeous page based on Rachels sketch.


Cathy


Rachel


Lou


Nat


We hope you enjoy using this sketch and are looking forward to seeing your creations!

Thursday 15 April 2010

March Challenge Winner

Firstly a big thankyou to everyone who entered our March challenge there were some stunning enteries and the design team had a hard job choosing a winner. We did have to choose one and the winner is Lou Collins with her page "you can be a real gent sometimes", well done Lou if you send us your email address we will get your prize over to you.
Here is her winning page.


Our next challenge will be going live over the next few days, we have got a fantastic sketch designed by Rachel Ward, so watch this space!

Sunday 11 April 2010

Butterflies

As some of you may know I absolutley love using butterflies on my pages and there is no shortage of choice at the moment! Aprils kit features some gorgeous papers called Ava by GCD covered in butterflies and some plain chipboard ones that will be perfect for painting, inking or covering in patterned paper.


These stamps by Jillibean Soup are really great and create a lovely clean image great for cutting out or colouring in.


Have you seen these Jenni Bowlin butterflies? Aren't they just gorgeous and they come in six colours. You will find them here in the shop.


Punches are one of my favourite ways to create embellishments for a page and there are some fantastic Martha Stewart butterfly punches over in the shop.

Thursday 8 April 2010

Giant Astroturf Chair.

Focusing on our "using up old stash" challenge Jen has created this gorgeous page using some old Jillibean Soup papers.
"When we went to London's Southbank earlier this year we came across this giant chair made from astroturf! Photos were essential and I've been looking forward to scrapping these, and when I saw these Jillibean Soup papers I knew they were perfect. I incorporated my title into my minimal journalling. "
Cardstock - Bazzill Swiss Dots
Papers - Jillibean Soup 'Whitebean Soup'
Photo Corners - American Crafts Thickers 'Chit Chat'
Alphabets - American Crafts Thickers 'Delight' and 'Lullaby'
Gems - KaisercraftChipboard - Heidi SwappPunch - Martha Stewart 'Two Dot Scallop'


You still have a few days left to enter the challenge, all you have to do is link your layout to the blog or email it across to sarah@sarahscardsltd.com by Monday 12th April.

Saturday 3 April 2010

Happy Easter

I hope you are all enjoying the long weekend and won't be tempted with too many chocolate treats tomorrow!
Hopefully spring is just around the corner, despite the snow up country, and we will soon be able to get out and about, enjoy some better weather and take some photos to scrap. The March kit is full of gorgeous floral papers from Prima just perfect for those spring pages.
Every kit comes with a professionally printed booklet showcasing what the design team have created with the kit, so for those of you who don't get the kit I thought you might like to see some of the team has been up to. There are still a few of these kits available for single purchase over in the shop.

Lou, On this LO I wanted to keep it quite simple so opted for the Kraft card as a background. I used circles to lead the eye intothe photo, and tore the fancy edges of the paper to add as strips behind the photo. I used a 6 petal flower punch and added rolled bits of paper and a painted chipboard shape to create an embellishment and layered it with detail cut from the patterned paper and paper twirls. One rub on was split and added to the left and rigt of thephoto, and the alpha stickers were added around the outer circle, with hand journaling added to the inner circle.


Cathy has distressed the blocks of paper to add extra depth to her page using a Tim Holtz paper distresser.


Tracy has made this stunning card, she has used the lovely tab punch to create an embellishment for the top of the card.


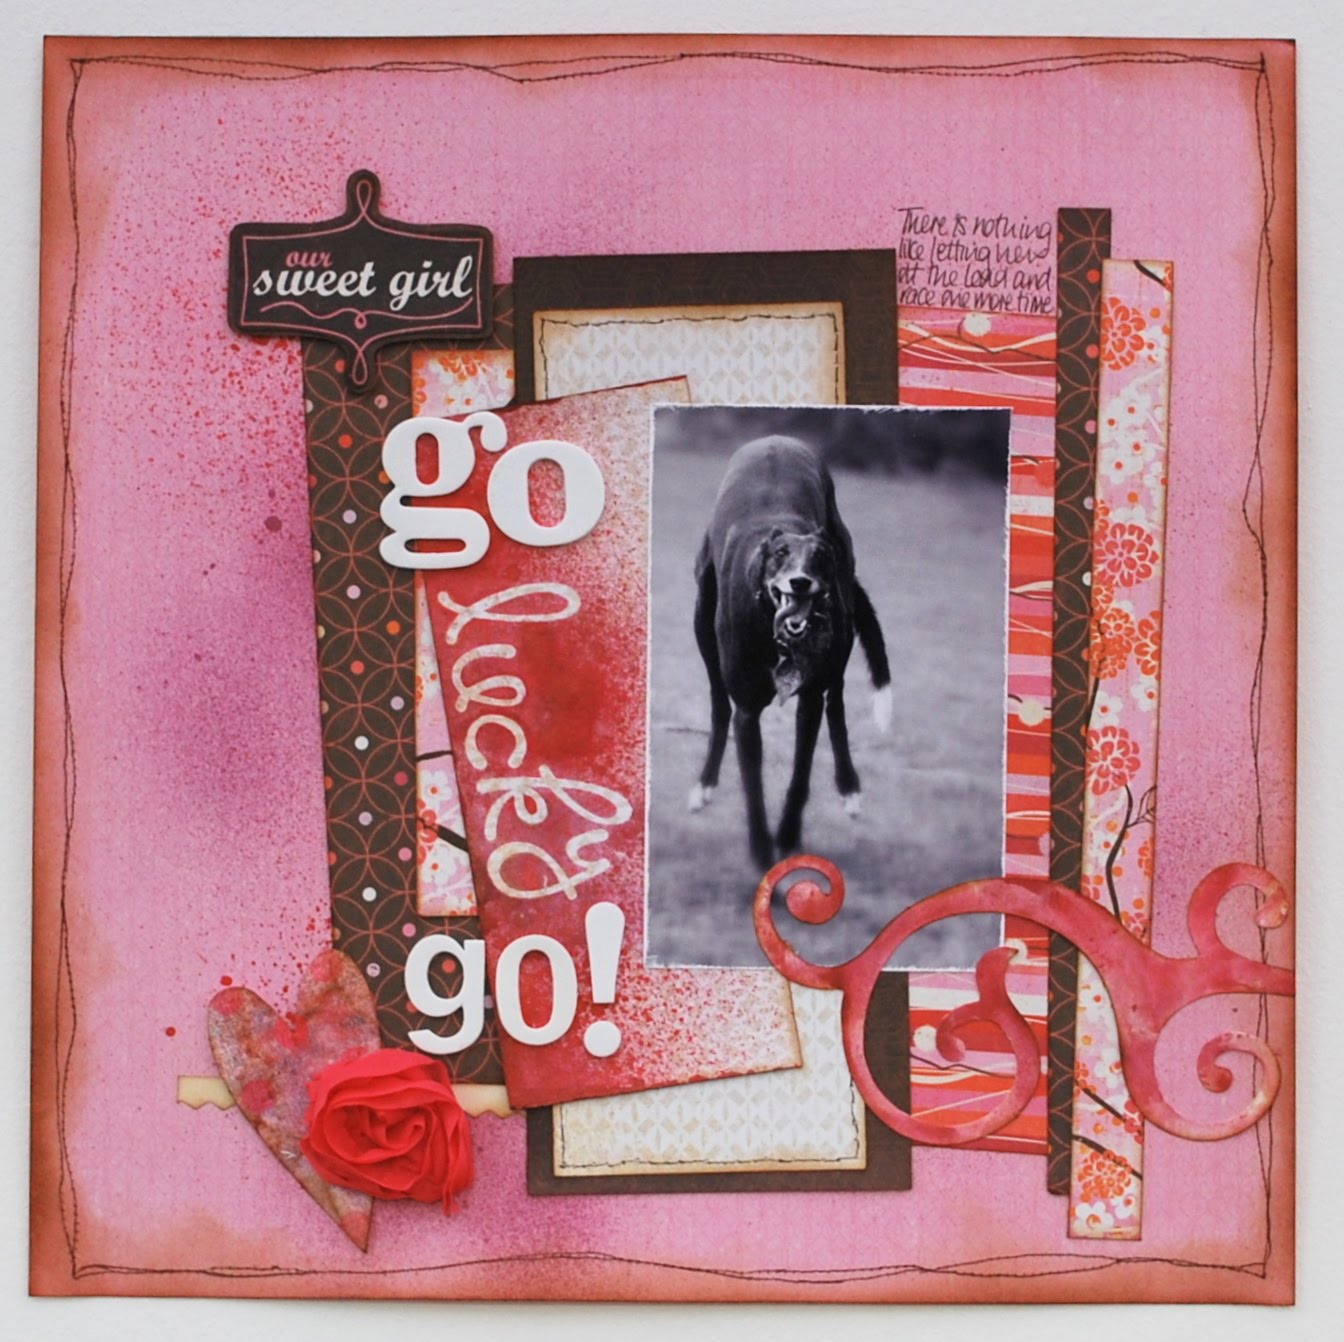
I loved this kit as there was so much that could be cut out of the papers and used to embellish my pages, this page although time consuming was very simple with lots of handcutting and silicone glue.


Don't forget the March challenge, we have had some stunning enteries and I think the design team are going to find it hard to choose a winner. If you would like to enter you still have time, the closing date is the 12th April just link your page to this blog or email it across to sarah@sarahscardsltd.com you could be in with a chance of winning a £10 e-voucher and an opportunity to join the design team to produce an example layout for the May challenge.